Tutorial: Configure Multiple Devices
This tutorial will show you how to configure multiple Devices at once. You will:
- Annotate Devices with Tags
- Set Desired Properties of Devices based on their Tags using Device Fleet Configuration.
This tutorial doesn't delve into how Devices obtain their Desired Properties from the Platform and how they report their Reported Properties back to it. To learn more about this mechanism, check out the previous tutorial.
Scenario
These arms are highly configurable; their most important configuration parameters are their speed and precision. Properly balancing these parameters allows the robotic arms to perform various tasks:
- Moving inventory in warehouses: Speed must be as high as possible while maintaining reasonable precision. This configuration is the default, so a robotic arm doesn't have to be explicitly configured for this purpose.
- Welding: Precision must be much higher than in the previous case, while speed can be lower.
Because your company produces these robotic arms in large quantities, you don't want to configure each individually. Furthermore, the usage of a single robotic arm can change over time, so you want to be able to reconfigure them easily.
First, you'll register two robotic arms, robo-arm-a and robo-arm-b, and annotate each of them with two Tags:
- The
deviceTypeof both arms will beroboticArmto distinguish them from other machines your company produces. - The
usageofrobo-arm-awill beinventoryMoving, whilerobo-arm-bwill have the valuewelding.
Then, you'll create a Device Fleet Configuration to automatically set the Desired Properties of all welding robotic arms.
The Configuration will set the speed to 5 and the precision to 0.9 (assume that the robotic arm knows how to interpret these values).
You'll observe how robo-arm-b receives the Desired Properties from the Platform.
Finally, you'll change the usage Tag of robo-arm-a to welding and see how the Platform reconfigures it.
Requirements
- PC or any other machine with either Linux or Windows.
- One of the following:
- Python of version ≥ 3.7
- C compiler (examples use GCC with Make on Linux and Visual Studio 2022 on Windows)
- Rust
- If you are not registered to the Spotflow IoT Platform yet, Sign Up.
- You need to have an existing Workspace and Provisioning Token.
1. Start Devices
First, you'll start two Device programs that will connect to the Platform as robo-arm-a and robo-arm-b:
- Python
- C
- Rust
If you haven't installed the Device SDK yet, run the following command:
pip install --upgrade spotflow-device
Paste the following code into a new file called configure_devices.py, or download it.
Replace the placeholder <Your Provisioning Token> with your Provisioning Token.
If you don't have a Provisioning Token, see Create Provisioning Token for instructions on creating it.
import json
import sys
import time
from spotflow_device import DeviceClient

if len(sys.argv) < 2:
    print("Usage: python configure_devices.py <Device ID>")
    sys.exit(1)

device_id = sys.argv[1]

# Connect to the Platform

client = DeviceClient.start(device_id=device_id, provisioning_token="<Your Provisioning Token>", db=f"spotf_{device_id}.db")

# Show all changes in configuration

desired_properties_version = None

while True:
    desired_properties = client.get_desired_properties_if_newer(desired_properties_version)
    if desired_properties is not None:
        print(f"[{client.device_id}] Received Desired Properties of version {desired_properties.version}:")
        print(json.dumps(desired_properties.values))

        desired_properties_version = desired_properties.version

        print(f"[{client.device_id}] Updating Reported Properties")
        client.update_reported_properties(desired_properties.values)

    time.sleep(1)
The program will display all changes to the Desired Properties and update the Reported Properties with the same values. See Tutorial: Configure Device for more details on how this mechanism works.
Navigate to the directory where you saved the file and run the following commands in two separate terminals. When run for the first time, each command will create a new Provisioning Operation and display its details:
> python configure_devices.py robo-arm-a
Provisioning operation initialized, waiting for approval.
Operation ID: 2b09af82-d620-4ea3-8422-4e36a95dc664
Verification Code: hek12e7a
> python configure_devices.py robo-arm-b
Provisioning operation initialized, waiting for approval.
Operation ID: 4163c36f-1a92-41d3-9e4c-e2873d99a97b
Verification Code: jq8hvuc1
Download the latest version of the Spotflow Device SDK library for your operating system and processor architecture:
Extract the archive to a directory of your choice.
Replace the contents of the file examples/get_started.c with the following code (download):
#include <stdbool.h>
#include <stdlib.h>
#include <stdio.h>
#include <string.h>
#include <time.h>
#include "spotflow.h"

#ifdef _WIN32
#include <windows.h>
#define gmtime_r(timer, buf) gmtime_s(buf, timer)
#define usleep(x) Sleep((x)/1000)
#else
#include <unistd.h>
#endif

#define DB_FILENAME_BUFFER_SIZE 64
#define PROPERTIES_BUFFER_SIZE 256

void show_last_error()
{
    size_t error_size = SPOTFLOW_ERROR_MAX_LENGTH;
    char* error_buffer = malloc(error_size);
    spotflow_read_last_error_message(error_buffer, error_size);
    printf("Error: %s\n", error_buffer);
    free(error_buffer);
}

int main(int argc, char* argv[])
{
    if (argc < 2)
    {
        printf("Usage: %s <Device ID>\n", argv[0]);
        return 1;
    }

    char* device_id = argv[1];

    char db_filename[DB_FILENAME_BUFFER_SIZE];
    snprintf(db_filename, DB_FILENAME_BUFFER_SIZE, "spotf_%s.db", device_id);

    spotflow_client_options_t* options;
    spotflow_client_options_create(&options, device_id, "<Your Provisioning Token>", db_filename);

    spotflow_client_t* client;
    if (spotflow_client_start(&client, options) != SPOTFLOW_OK)
    {
        show_last_error();
        return 1;
    }

    uint64_t desired_properties_version = SPOTFLOW_PROPERTIES_VERSION_ANY;

    char buffer[PROPERTIES_BUFFER_SIZE];

    // Keep configuration in sync
    while (1)
    {
        size_t desired_properties_length;
        uint64_t new_desired_properties_version;
        spotflow_client_get_desired_properties_if_newer(
            client,
            desired_properties_version,
            buffer,
            PROPERTIES_BUFFER_SIZE,
            &desired_properties_length,
            &new_desired_properties_version);

        if (desired_properties_length > 0)
        {
            printf(
                "[%s] Received Desired Properties of version %lu:\n%s\n",
                device_id,
                (unsigned long)new_desired_properties_version,
                buffer);

            desired_properties_version = new_desired_properties_version;

            printf("[%s] Updating Reported Properties\n", device_id);
            spotflow_client_update_reported_properties(client, buffer);
        }

        usleep(1000 * 1000);
    }

    // This code is now unreachable, kept here for completeness
    spotflow_client_destroy(client);
    spotflow_client_options_destroy(options);
}
Replace the placeholder <Your Provisioning Token> with your Provisioning Token.
If you don't have a Provisioning Token, see Create Provisioning Token for instructions on creating it.
Compile the program and start two instances of it:
- Linux
- Windows
Make sure that you have gcc and make installed.
Navigate to the directory examples/gcc_makefile_dynamic and run the following command:
make build
Run the compiled program in two separate terminals:
> ./get_started robo-arm-a
Provisioning operation initialized, waiting for approval.
Operation ID: 2b09af82-d620-4ea3-8422-4e36a95dc664
Verification Code: hek12e7a
> ./get_started robo-arm-b
Provisioning operation initialized, waiting for approval.
Operation ID: 4163c36f-1a92-41d3-9e4c-e2873d99a97b
Verification Code: jq8hvuc1
Open the solution examples/vs2022_dynamic/spotflow_example.sln in Visual Studio 2022.
Press F6 or Build > Build Solution to build the example program.
Navigate to the directory examples/vs2022_dynamic/x64/Debug and run the compiled program in two separate terminals:
> ./get_started robo-arm-a
Provisioning operation initialized, waiting for approval.
Operation ID: 2b09af82-d620-4ea3-8422-4e36a95dc664
Verification Code: hek12e7a
> ./get_started robo-arm-b
Provisioning operation initialized, waiting for approval.
Operation ID: 4163c36f-1a92-41d3-9e4c-e2873d99a97b
Verification Code: jq8hvuc1
Run the following commands to create a new Rust project and add the crate spotflow to the dependencies:
cargo new configure_devices --bin
cd configure_devices
cargo add spotflow
Replace the contents of src/main.rs with the following code (download):
use spotflow::DeviceClientBuilder;

fn main() {
    let args: Vec<String> = std::env::args().collect();

    if args.len() != 2 {
        println!("Usage: {} <Device ID>", args[0]);
        std::process::exit(1);
    }

    let device_id = &args[1];

    // Connect to the Platform

    let provisioning_token = String::from("<Your Provisiniong Token>");

    let client = DeviceClientBuilder::new(
        Some(device_id.clone()),
        provisioning_token,
        format!("spotf_{device_id}.db"),
    )
    .build()
    .expect("Unable to connect to the Platform");

    let mut desired_properties_version = None;

    loop {
        let desired_properties = match desired_properties_version {
            Some(version) => client.desired_properties_if_newer(version),
            None => Some(
                client
                    .desired_properties()
                    .expect("Error getting Desired Properties"),
            ),
        };

        if let Some(desired_properties) = desired_properties {
            println!(
                "[{}] Received Desired Properties of version {}:\n{}",
                client.device_id().unwrap(),
                desired_properties.version,
                desired_properties.values
            );

            desired_properties_version = Some(desired_properties.version);

            println!("[{}] Updating Reported Properties", client.device_id().unwrap());
            client
                .update_reported_properties(&desired_properties.values)
                .expect("Unable to update the Reported Properties");
        }

        std::thread::sleep(std::time::Duration::from_secs(1));
    }
}
Replace the placeholder <Your Provisioning Token> with your Provisioning Token.
If you don't have a Provisioning Token, see Create Provisioning Token for instructions on creating it.
Run the following commands in two separate terminals:
> cargo run robo-arm-a
Provisioning operation initialized, waiting for approval.
Operation ID: 2b09af82-d620-4ea3-8422-4e36a95dc664
Verification Code: hek12e7a
> cargo run robo-arm-b
Provisioning operation initialized, waiting for approval.
Operation ID: 4163c36f-1a92-41d3-9e4c-e2873d99a97b
Verification Code: jq8hvuc1
2. Approve Devices with Tags
You'll now approve both Devices into the Platform and annotate them with Tags:
- Portal
- API
Login to the Spotflow IoT Platform Portal and follow the instructions:
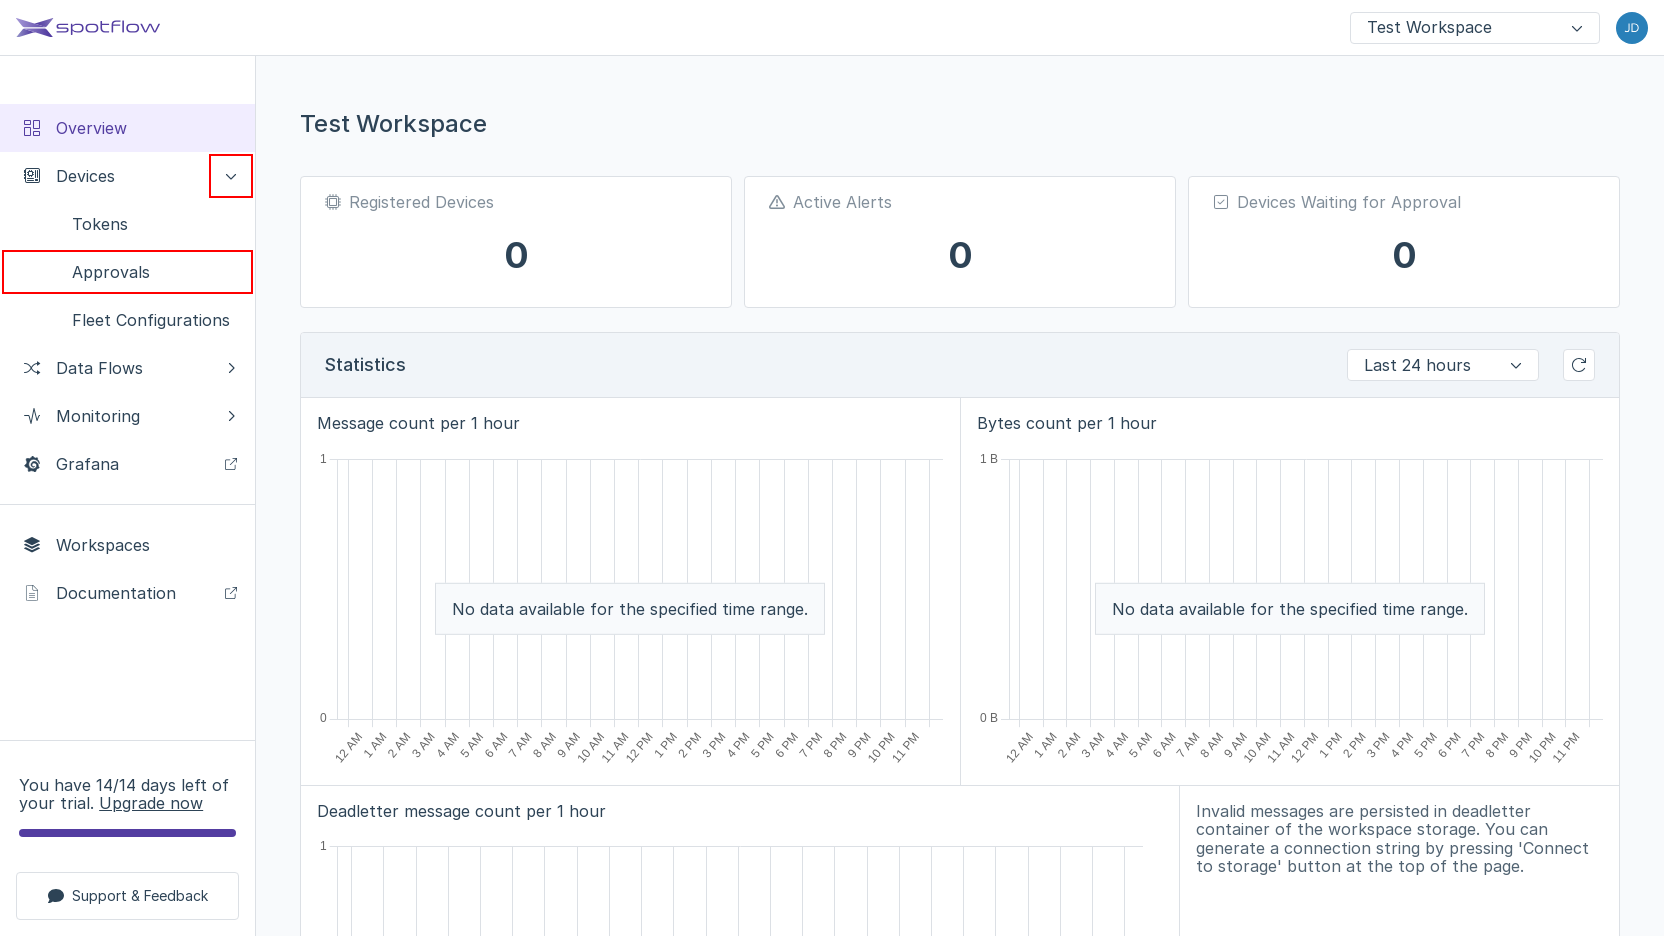
Expand the section Devices in the left sidebar and open the link Approvals.
The list of Provisioning Operations opens. You should see two rows with the Device ID
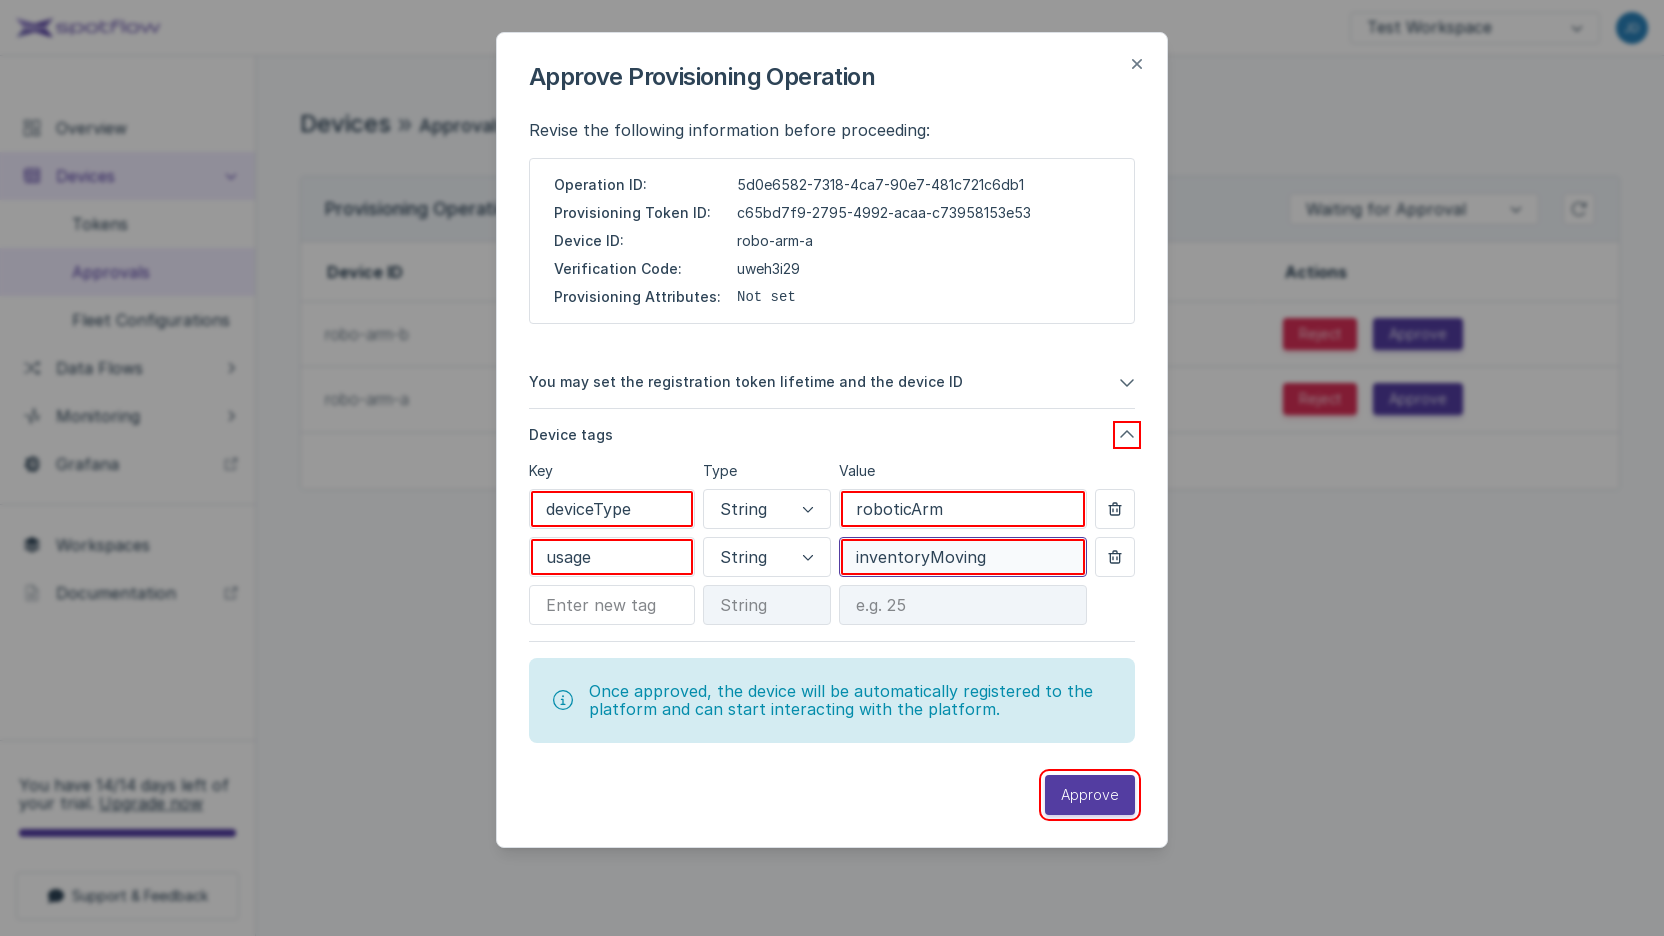
robo-arm-bandrobo-arm-a. Click Approve ofrobo-arm-ain the column Actions.The approval dialog window opens. Expand Device tags and enter the following Tags in the table:
deviceType-roboticArm,usage-inventoryMoving. Click Approve.An approval confirmation shows up. Click Approve of
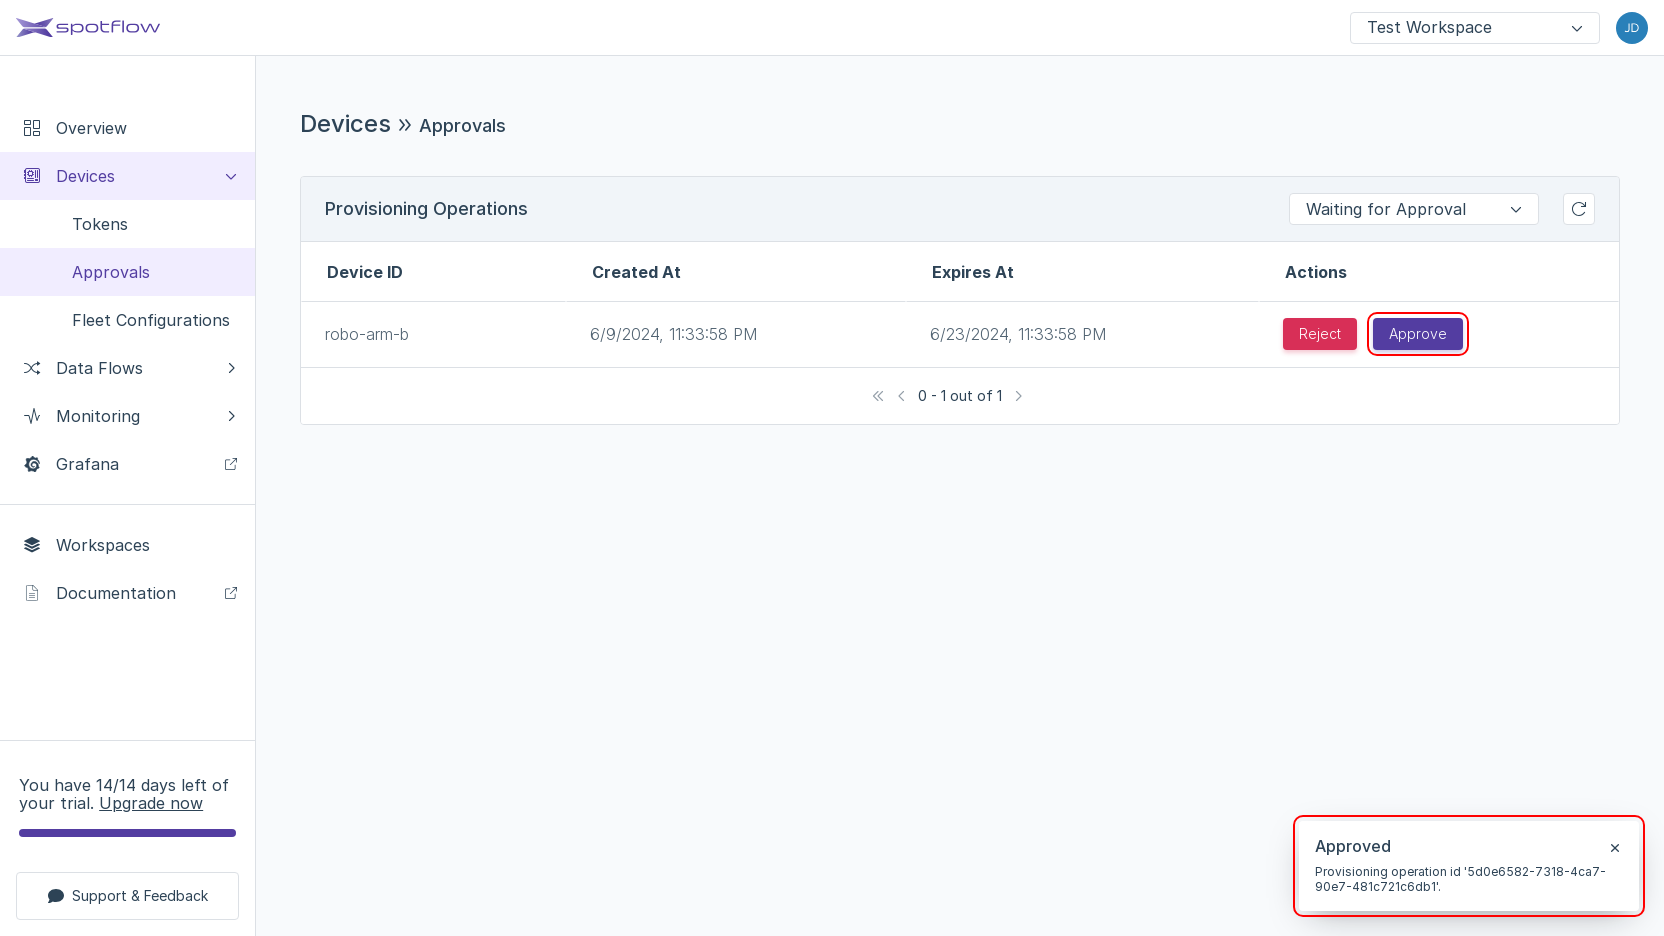
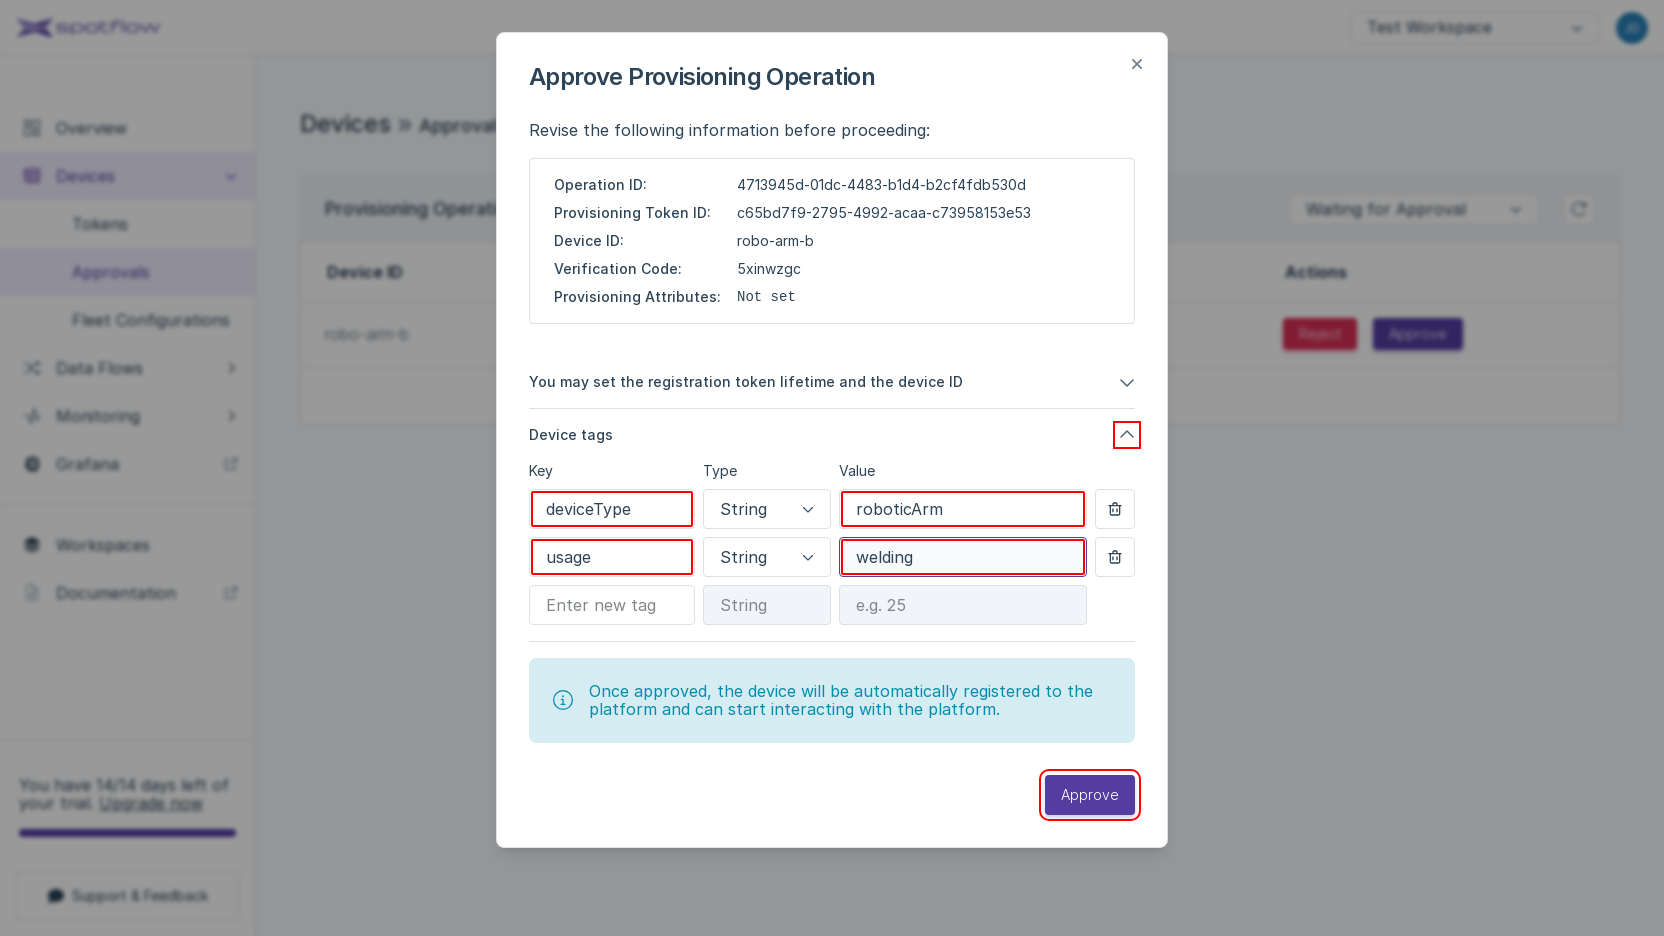
robo-arm-bin the column Actions.In the approval dialog for
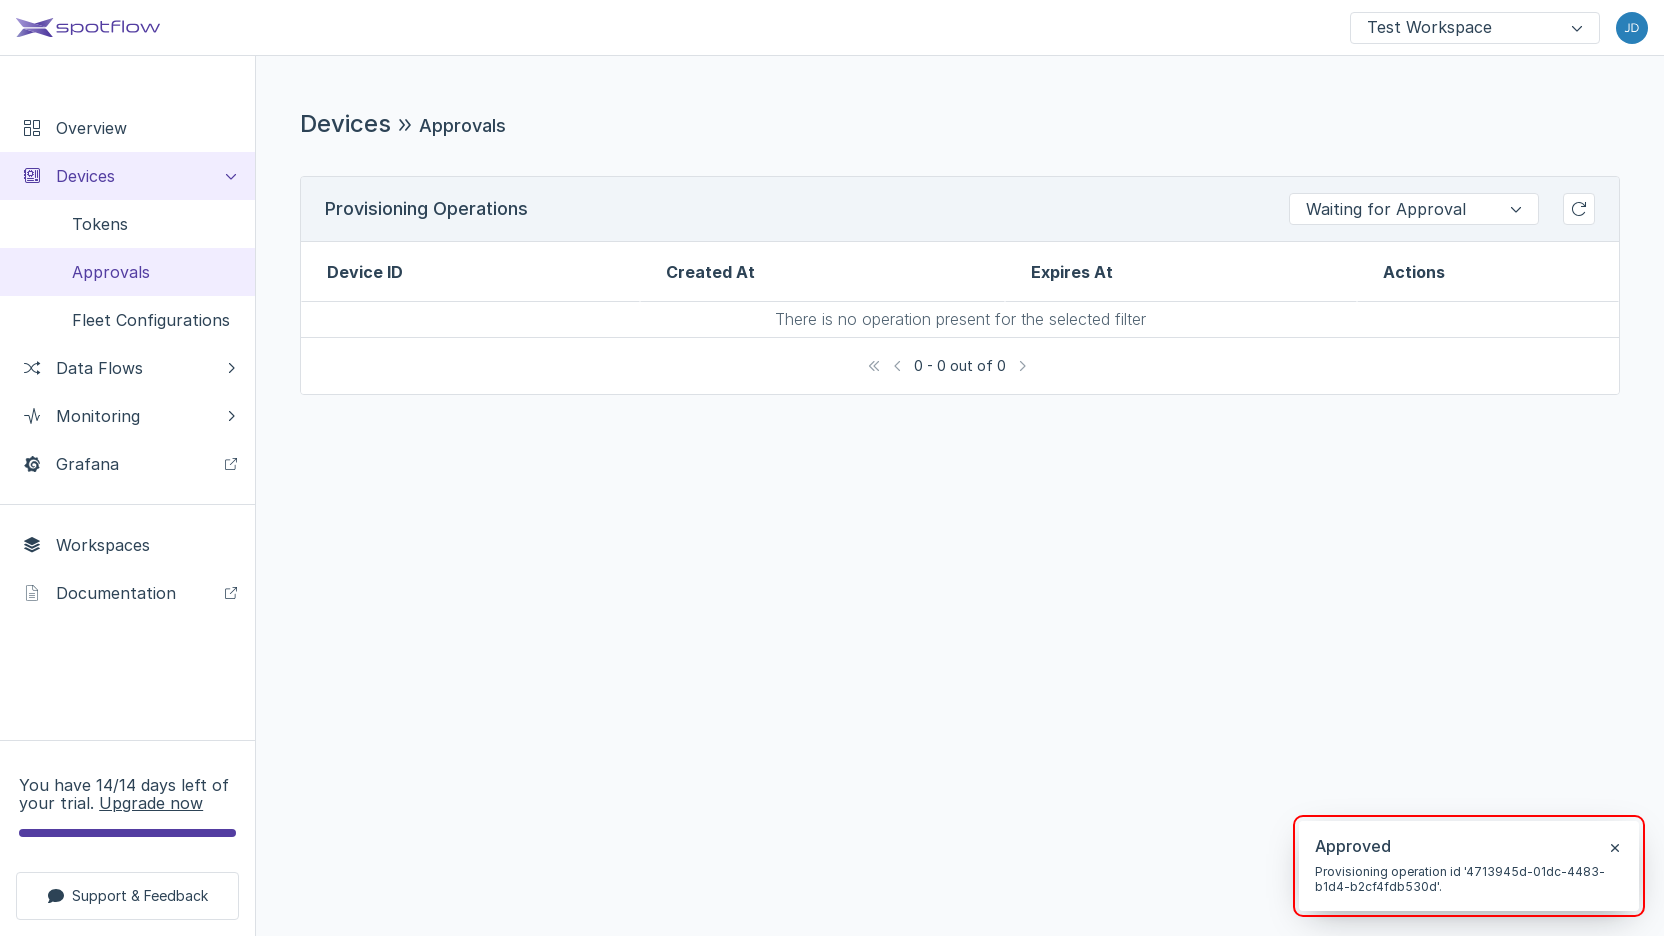
robo-arm-b, expand Device tags and enter the following Tags in the table:deviceType-roboticArm,usage-welding. Click Approve.A box with the title Approved confirms that you've successfully approved
robo-arm-b.
First, open a new terminal window. Replace these placeholders in the following command and run it to store these values in variables:
<Your Workspace ID>: The Portal page Workspaces shows the Workspace ID.<Your API Access Token>: The Portal lets you obtain a short-term API access token. See the instructions.
- cURL
- PowerShell
access_token='<Your API Access Token>'
workspace_id='<Your Workspace ID>'
$accessToken = '<Your API Access Token>'
$workspaceId = '<Your Workspace ID>'
Then, approve robo-arm-a as a robotic arm for moving inventory.
Replace the placeholder with the Provisioning Operation ID of robo-arm-a that you received in the previous step:
- cURL
- PowerShell
curl -X PUT "https://api.eu1.spotflow.io/workspaces/$workspace_id/provisioning-operations/approve" \
 -H "Content-Type: application/json" \
 -H "Authorization: Bearer $access_token" \
 -d '{
       "provisioningOperationId": "<Provisioning Operation ID of robo-arm-a>",
       "tags": {
         "deviceType": "roboticArm",
         "usage": "inventoryMoving"
       }
    }' \
 -w "%{http_code}"
$body = @"
{
    "provisioningOperationId": "<Provisioning Operation ID of robo-arm-a>",
    "tags": {
        "deviceType": "roboticArm",
        "usage": "inventoryMoving"
    }
}
"@

(Invoke-WebRequest -Method Put -Uri "https://api.eu1.spotflow.io/workspaces/$workspaceId/provisioning-operations/approve" `
 -Headers @{
   'Content-Type' = 'application/json'
   'Authorization' = "Bearer $accessToken"
 } `
 -Body $body).StatusCode
The API will return the code 201 to confirm the approval.
Finally, approve robo-arm-b as a robotic arm for welding.
Again, replace the placeholder with the Provisioning Operation ID of robo-arm-b:
- cURL
- PowerShell
curl -X PUT "https://api.eu1.spotflow.io/workspaces/$workspace_id/provisioning-operations/approve" \
 -H "Content-Type: application/json" \
 -H "Authorization: Bearer $access_token" \
 -d '{
       "provisioningOperationId": "<Provisioning Operation ID of robo-arm-b>",
       "tags": {
         "deviceType": "roboticArm",
         "usage": "welding"
       }
    }' \
 -w "%{http_code}"
$body = @"
{
    "provisioningOperationId": "<Provisioning Operation ID of robo-arm-b>",
    "tags": {
        "deviceType": "roboticArm",
        "usage": "welding"
    }
}
"@

(Invoke-WebRequest -Method Put -Uri "https://api.eu1.spotflow.io/workspaces/$workspaceId/provisioning-operations/approve" `
 -Headers @{
   'Content-Type' = 'application/json'
   'Authorization' = "Bearer $accessToken"
 } `
 -Body $body).StatusCode
Again, the API will return the code 201 to confirm the approval.
After each approval, the Device program of the corresponding robotic arm will enter the main loop. It will receive the Desired Properties from the Platform and display them. Initially, the Desired Properties will be empty:
[robo-arm-a] Received Desired Properties of version 1:
{}
[robo-arm-a] Updating Reported Properties
[robo-arm-b] Received Desired Properties of version 1:
{}
[robo-arm-b] Updating Reported Properties
3. Create Device Fleet Configuration
While the programs for both Devices are still running, you'll create a Device Fleet Configuration to automatically set the Desired Properties of welding robotic arms based on their Tags.
- Portal
- API
Create the Configuration robo-arm-welding:
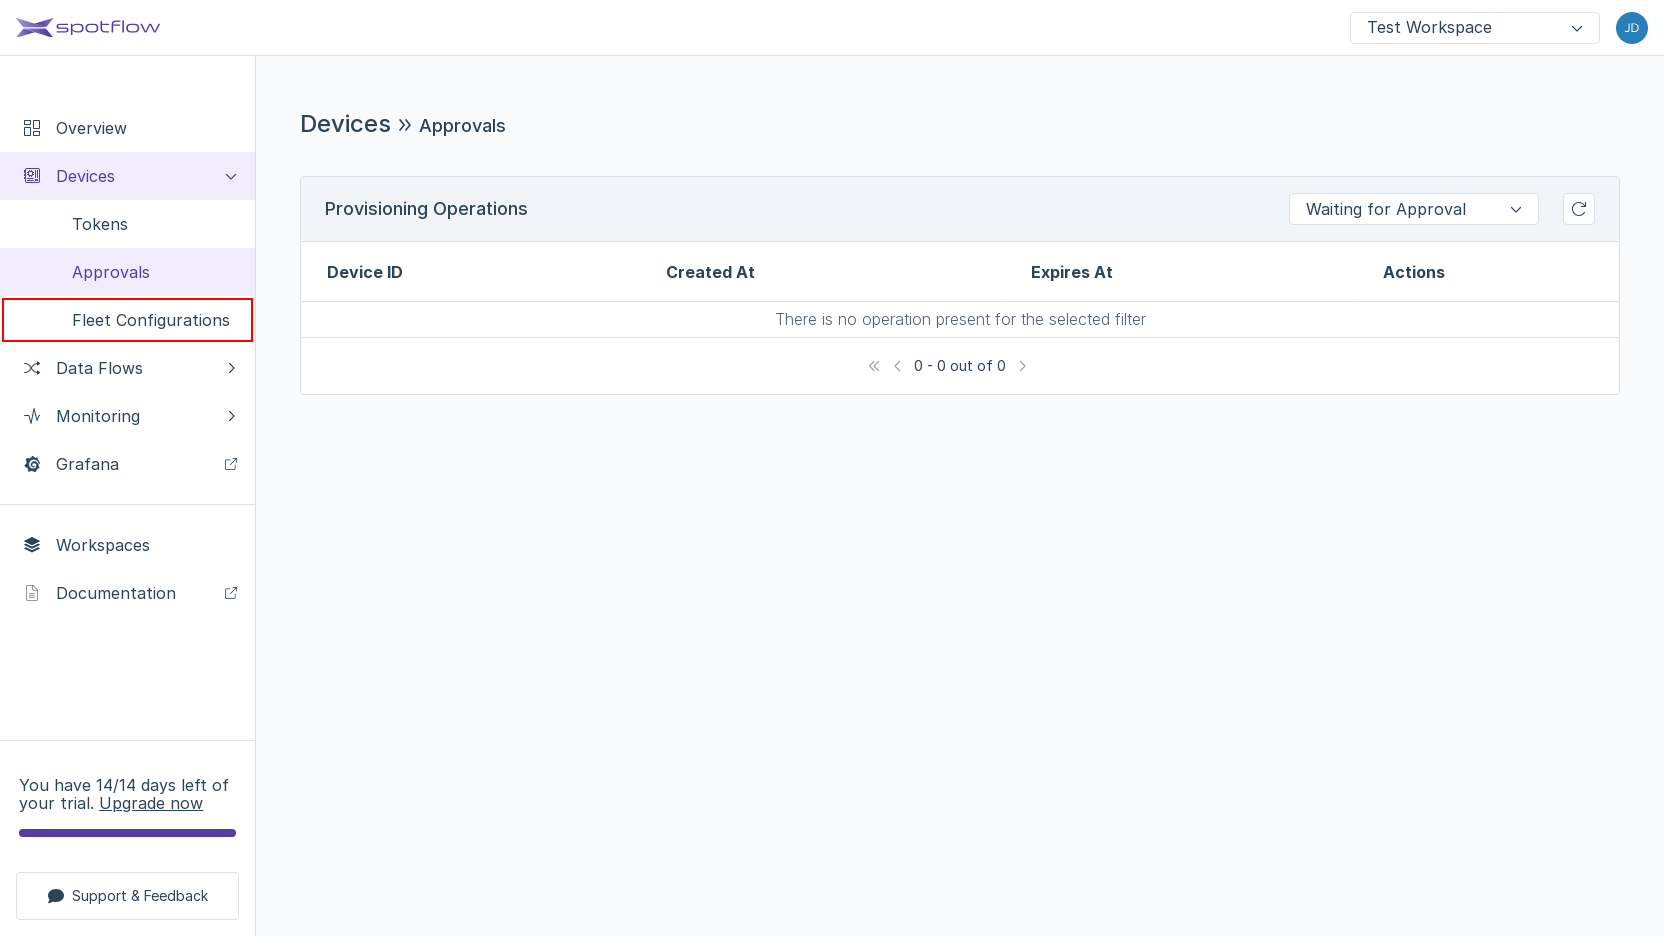
Open the link Configurations in the left sidebar.
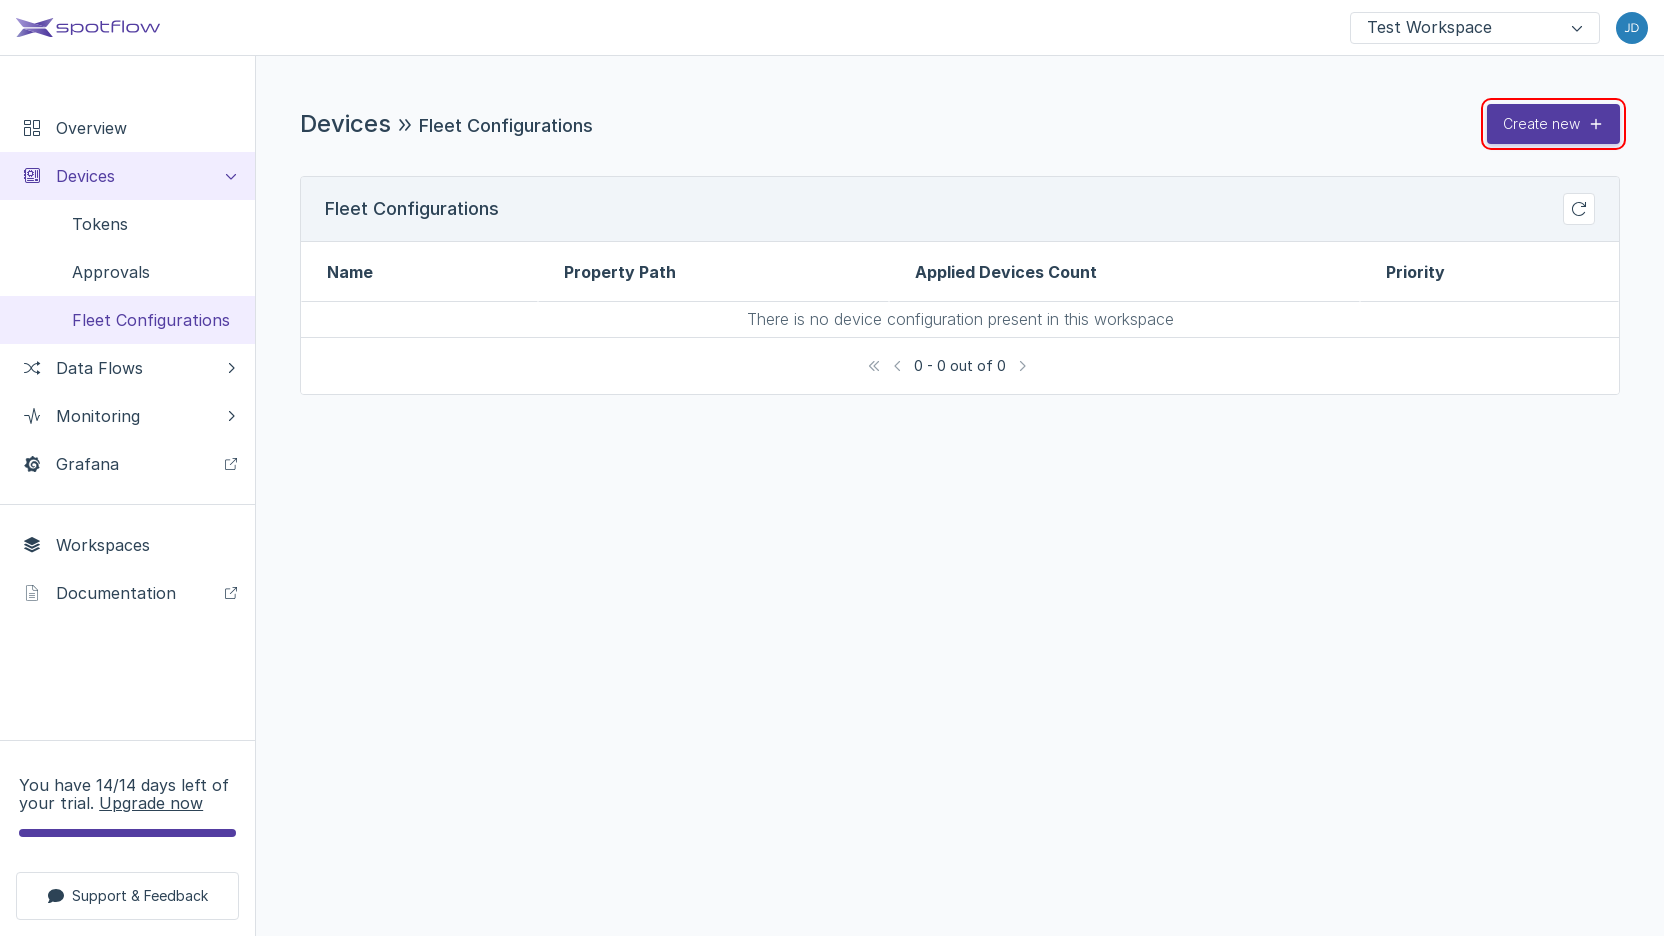
Click Create new.
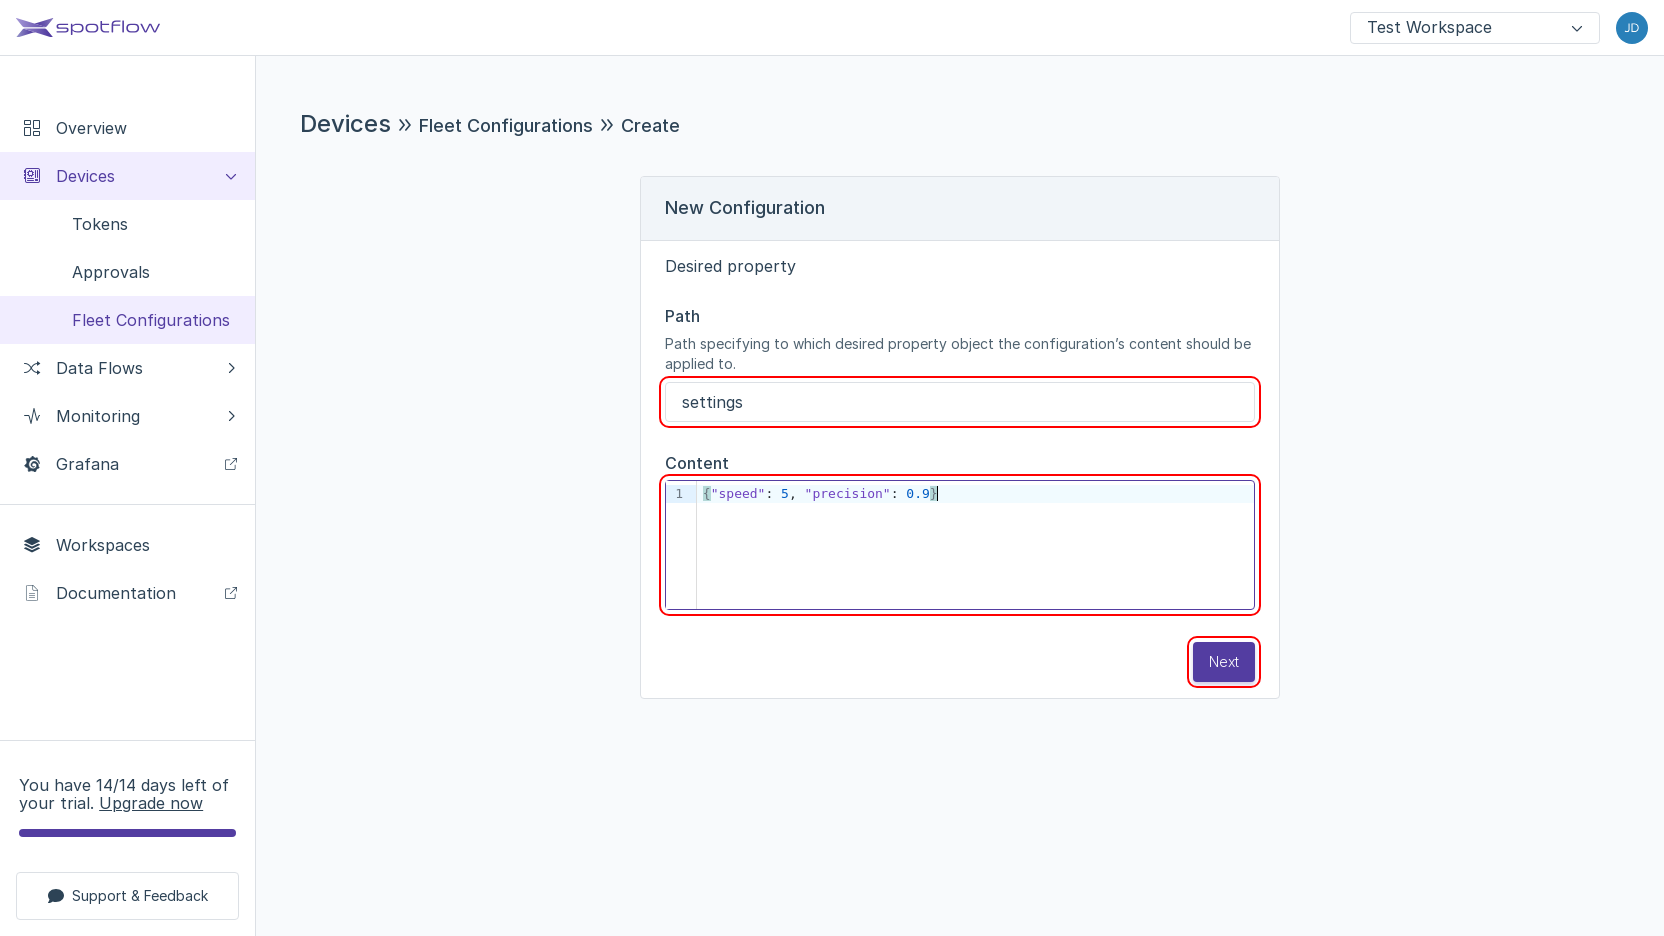
In the first page of the wizard, enter `settings` to Path and
{"speed": 5, "precision": 0.9}to Content. Click Next.In the second page of the wizard, enter
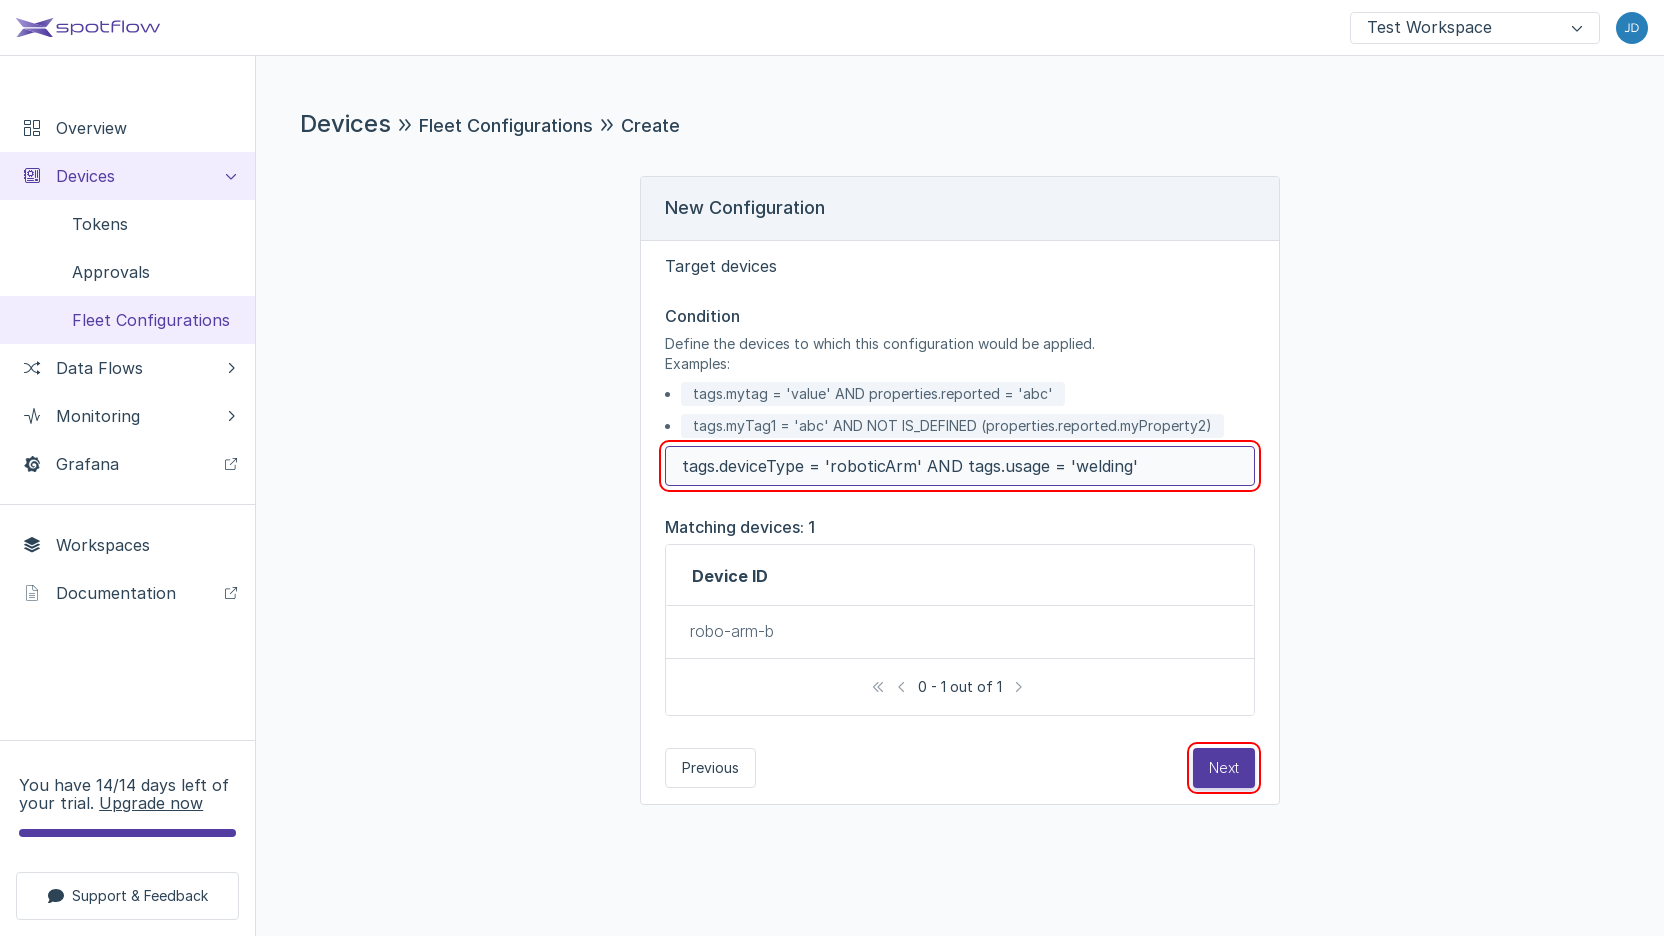
tags.deviceType = 'roboticArm' AND tags.usage = 'welding'to Condition. The list of Matching devices should show that the Configuration will targetrobo-arm-b. Click Next.In the last page of the wizard, enter
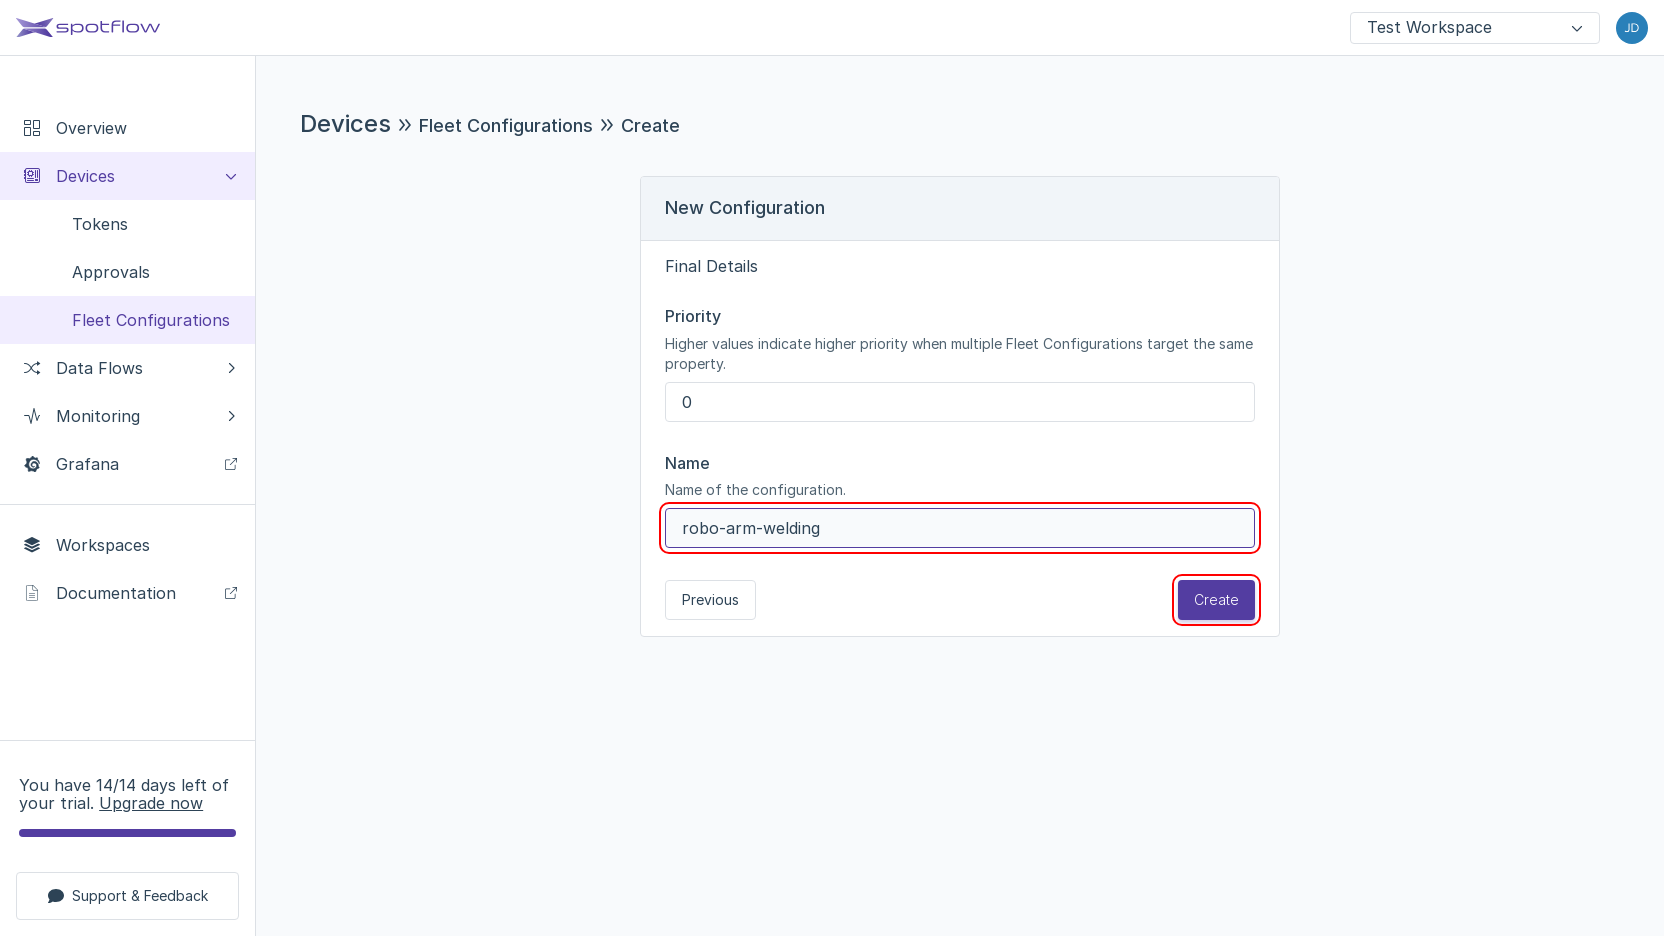
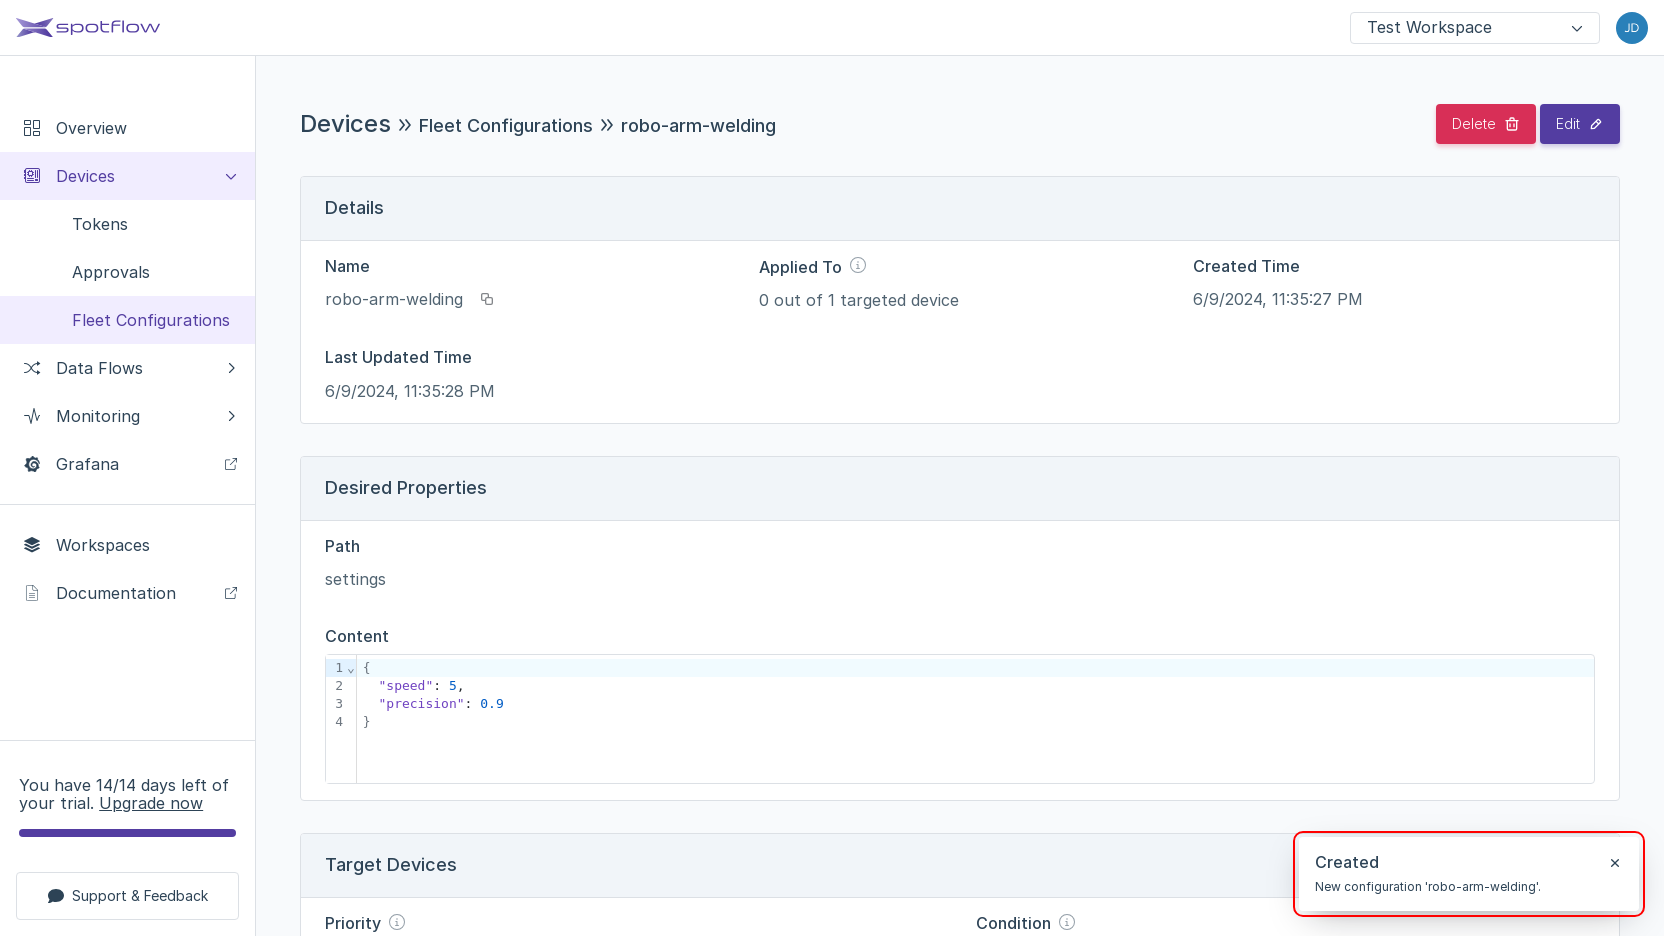
robo-arm-weldingas the Configuration Name. Click Create.A box with the title Created confirms that you've successfully created the Configuration.
The following command expects that you've stored your Workspace ID and API Access Token in the corresponding variables in the previous step.
Before you create the Configuration, check which Devices will be targeted by it:
- cURL
- PowerShell
curl -X POST "https://api.eu1.spotflow.io/workspaces/$workspace_id/device-fleet-configurations/validate/device-list" \
 -H "Content-Type: application/json" \
 -H "Authorization: Bearer $access_token" \
 -d '{"targetCondition": "tags.deviceType = '\''roboticArm'\'' AND tags.usage = '\''welding'\''"}'
(Invoke-WebRequest -Method Post -Uri "https://api.eu1.spotflow.io/workspaces/$workspaceId/device-fleet-configurations/validate/device-list" `
 -Headers @{
   'Content-Type' = 'application/json'
   'Authorization' = "Bearer $accessToken"
 } `
 -Body "{`"targetCondition`": `"tags.deviceType = 'roboticArm' AND tags.usage = 'welding'`"}").Content
The Platform will return a list containing only robo-arm-b:
[
    {
        "deviceId": "robo-arm-b",
        "alreadyTargetedBy": []
    }
]
Create the Configuration robo-arm-welding:
- cURL
- PowerShell
curl -X PATCH "https://api.eu1.spotflow.io/workspaces/$workspace_id/device-fleet-configurations/robo-arm-welding" \
 -H "Content-Type: application/json" \
 -H "Authorization: Bearer $access_token" \
 -d '{
       "priority": 1,
       "targetCondition": "tags.deviceType = '\''roboticArm'\'' AND tags.usage = '\''welding'\''",
       "desiredPropertyPath": "settings",
       "desiredProperty": {
           "speed": 5,
           "precision": 0.9
       }
    }'
$body = @"
{
    "priority": 1,
    "targetCondition": "tags.deviceType = 'roboticArm' AND tags.usage = 'welding'",
    "desiredPropertyPath": "settings",
    "desiredProperty": {
        "speed": 5,
        "precision": 0.9
    }
}
"@

(Invoke-WebRequest -Method Patch -Uri "https://api.eu1.spotflow.io/workspaces/$workspaceId/device-fleet-configurations/robo-arm-welding" `
 -Headers @{
   'Content-Type' = 'application/json'
   'Authorization' = "Bearer $accessToken"
 } `
 -Body $body).Content
The Platform will return the details of the newly created Configuration (the JSON is formatted for better readability):
{
    "name": "robo-arm-welding",
    "createdTime": "2024-05-09T14:21:27.7377019+00:00",
    "lastUpdatedTime": "2024-05-09T14:21:27.7377019+00:00",
    "priority": 1,
    "targetCondition": "tags.deviceType = 'roboticArm' AND tags.usage = 'welding'",
    "desiredPropertyPath": "settings",
    "desiredProperty": {
        "speed": 5,
        "precision": 0.9
    }
    "systemMetrics": {}
}
After creating the Configurations, robo-arm-b will receive the proper Desired Properties:
[robo-arm-b] Received Desired Properties of version 2:
{"settings": {"precision": 0.9, "speed": 5}}
[robo-arm-b] Updating Reported Properties
It might take up to a few minutes for the Platform to apply the Configurations. While this delay might be slightly inconvenient during development and testing, there's rarely a need for immediate configuration changes in production environments.
4. Update Tags
Finally, you'll change the usage Tag of robo-arm-a to welding and observe how the Platform automatically reconfigures it:
- Portal
- API
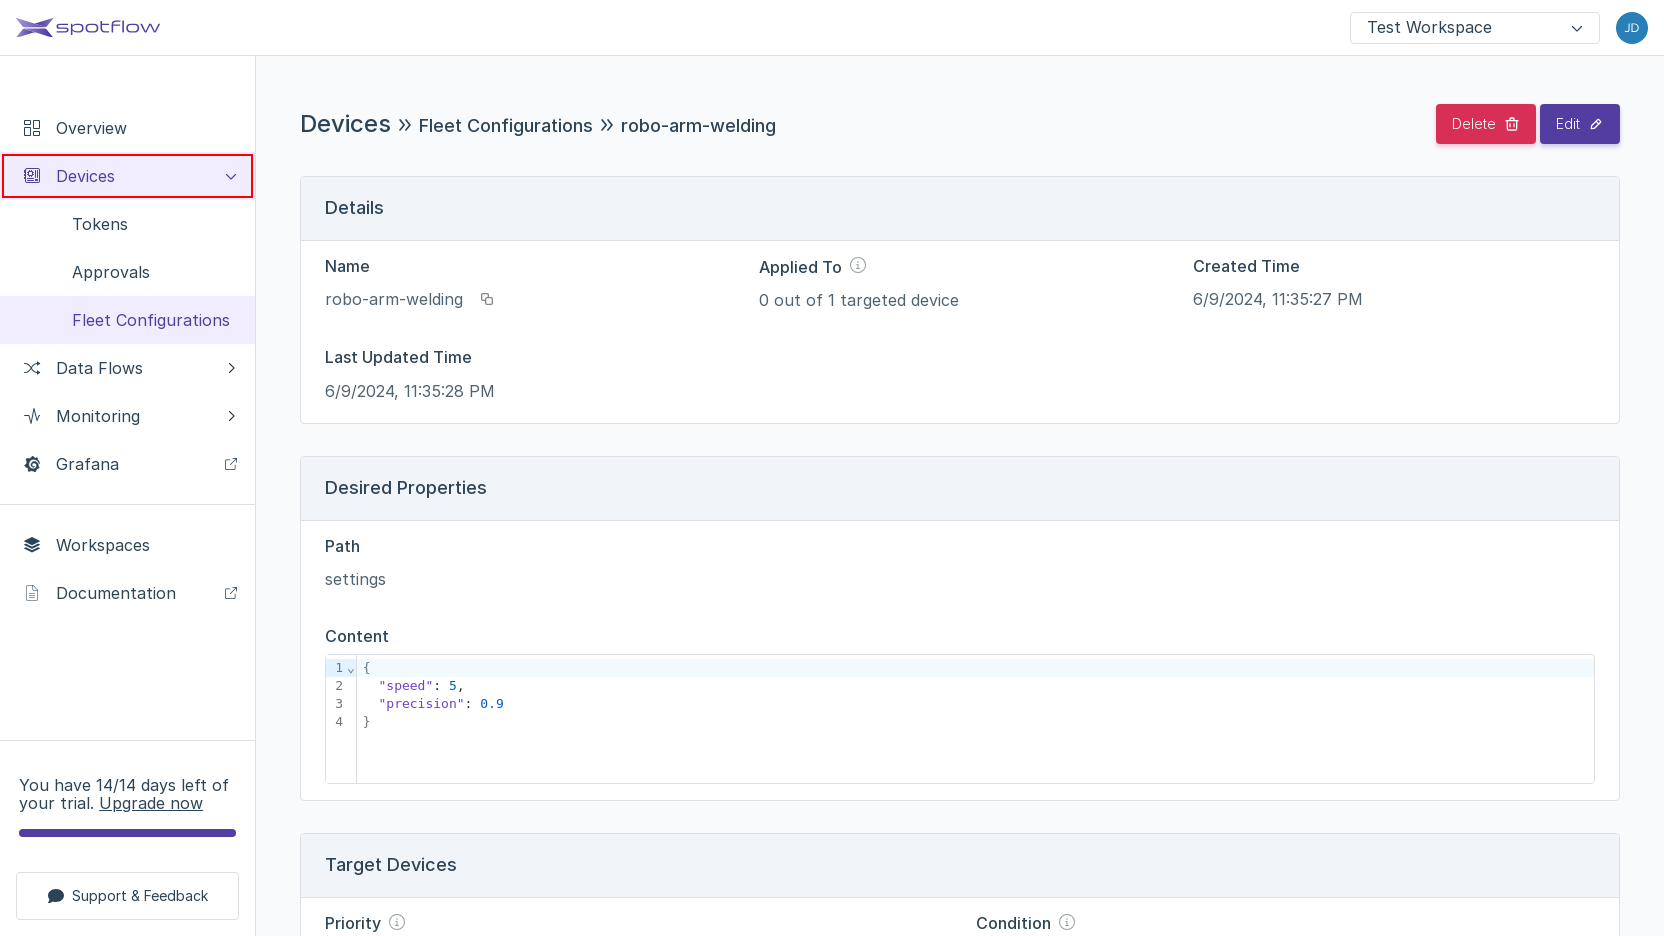
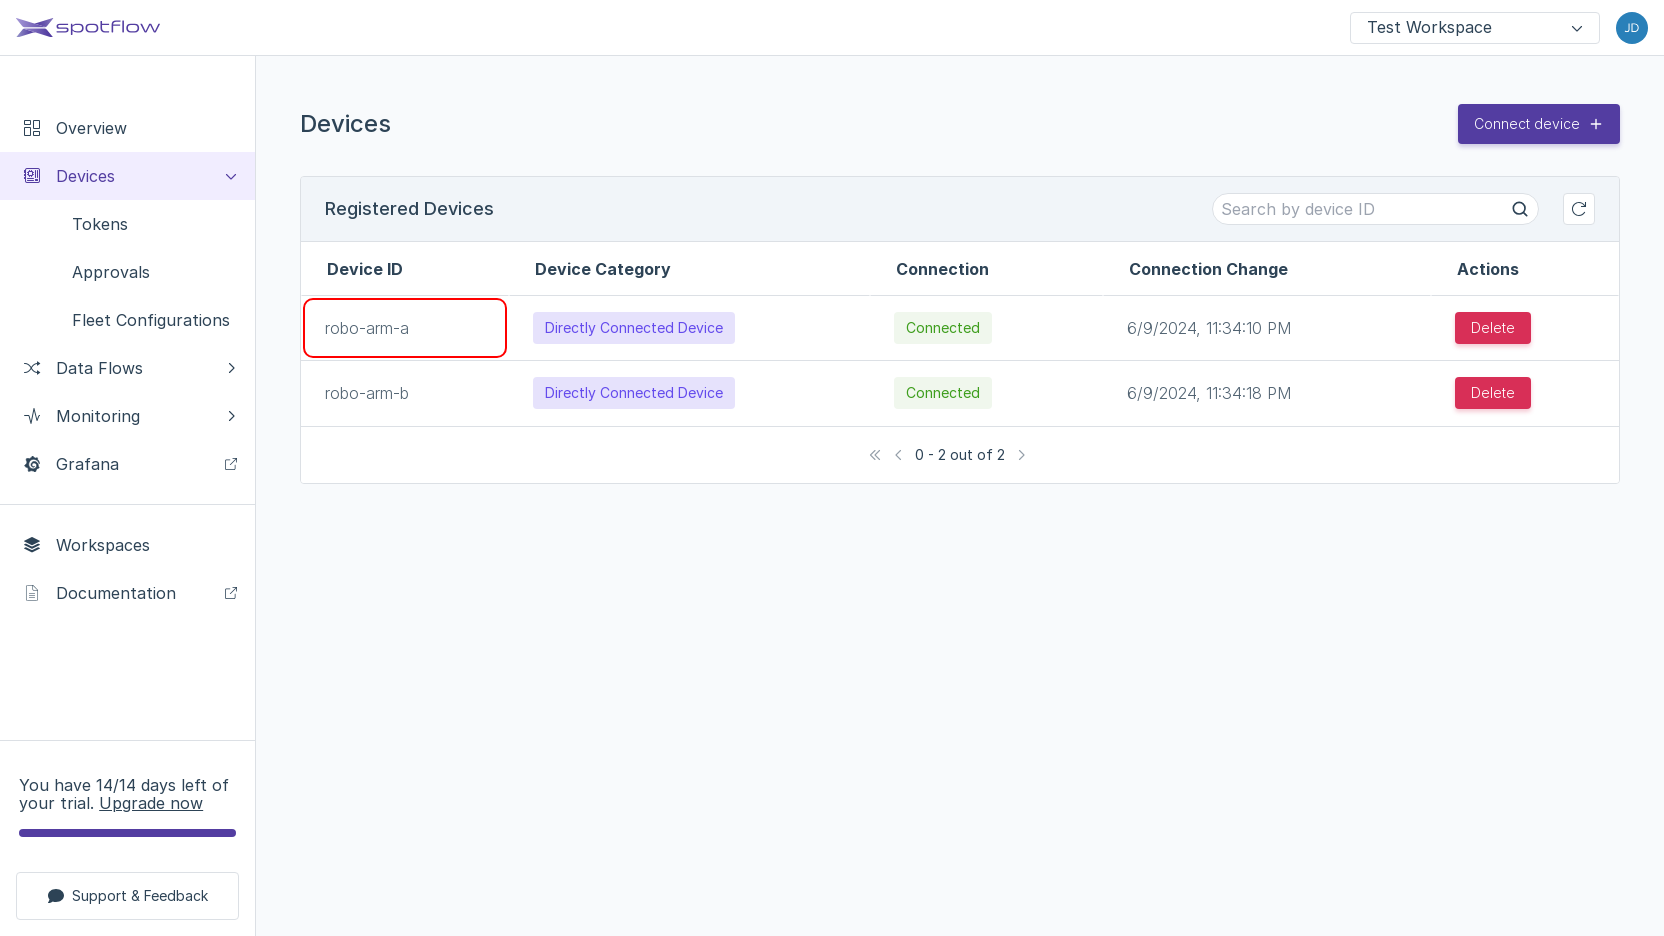
Open the list of Devices using the link in the left sidebar.
Click the Device ID
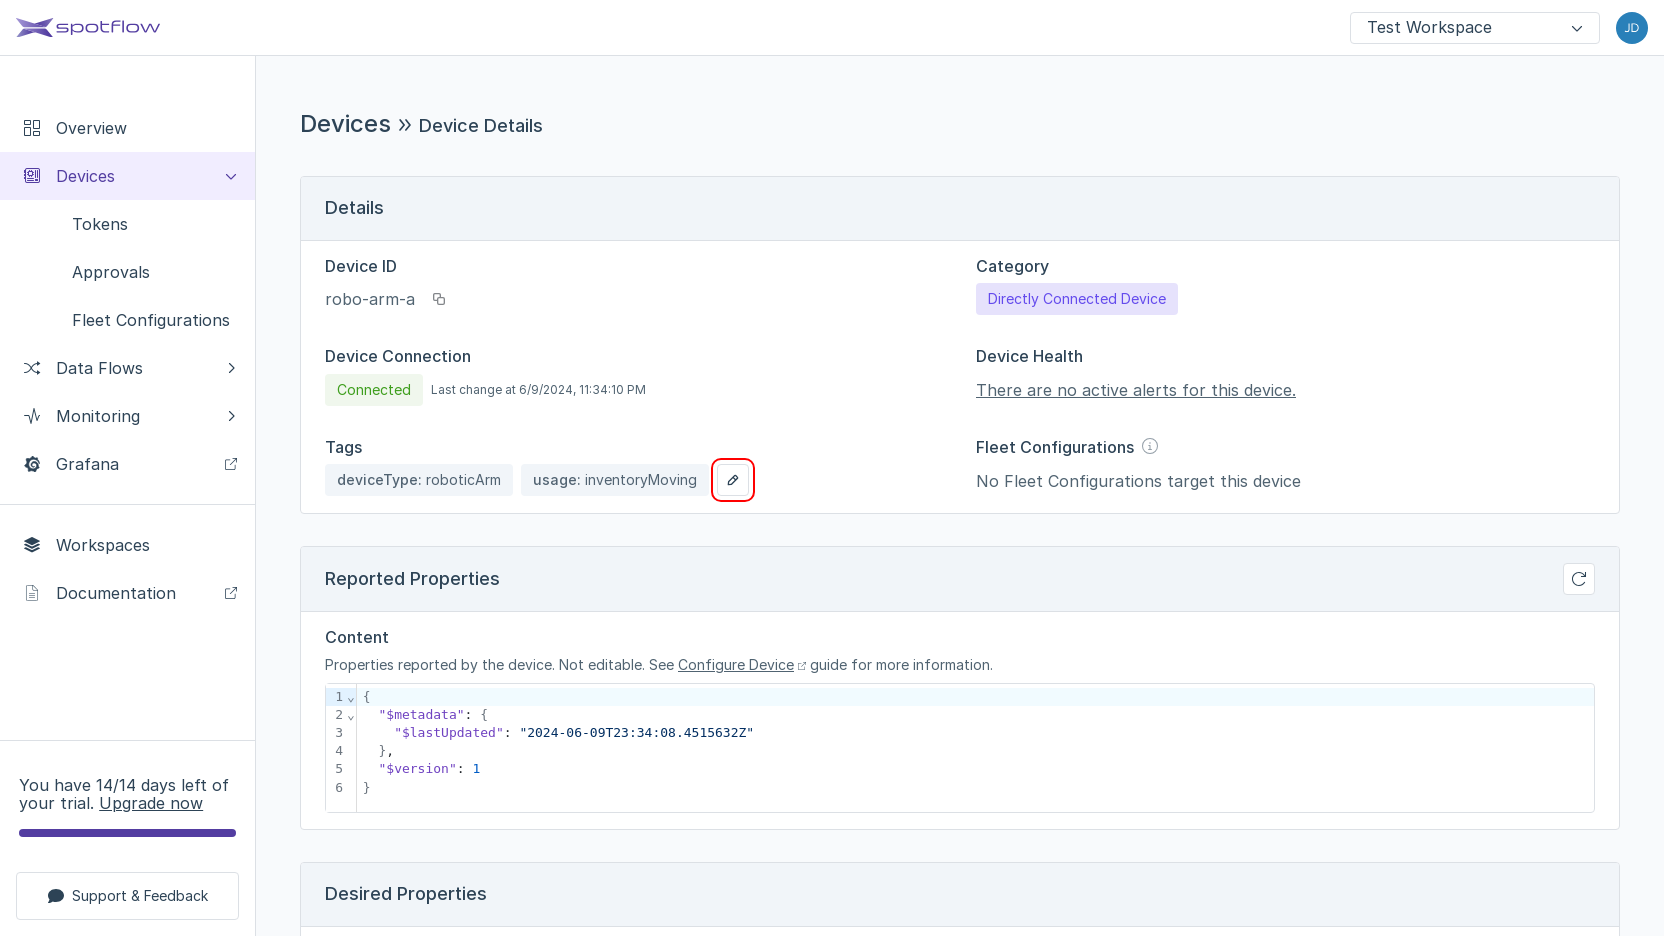
robo-arm-a.In Device Details, click the edit icon under the section Tags.
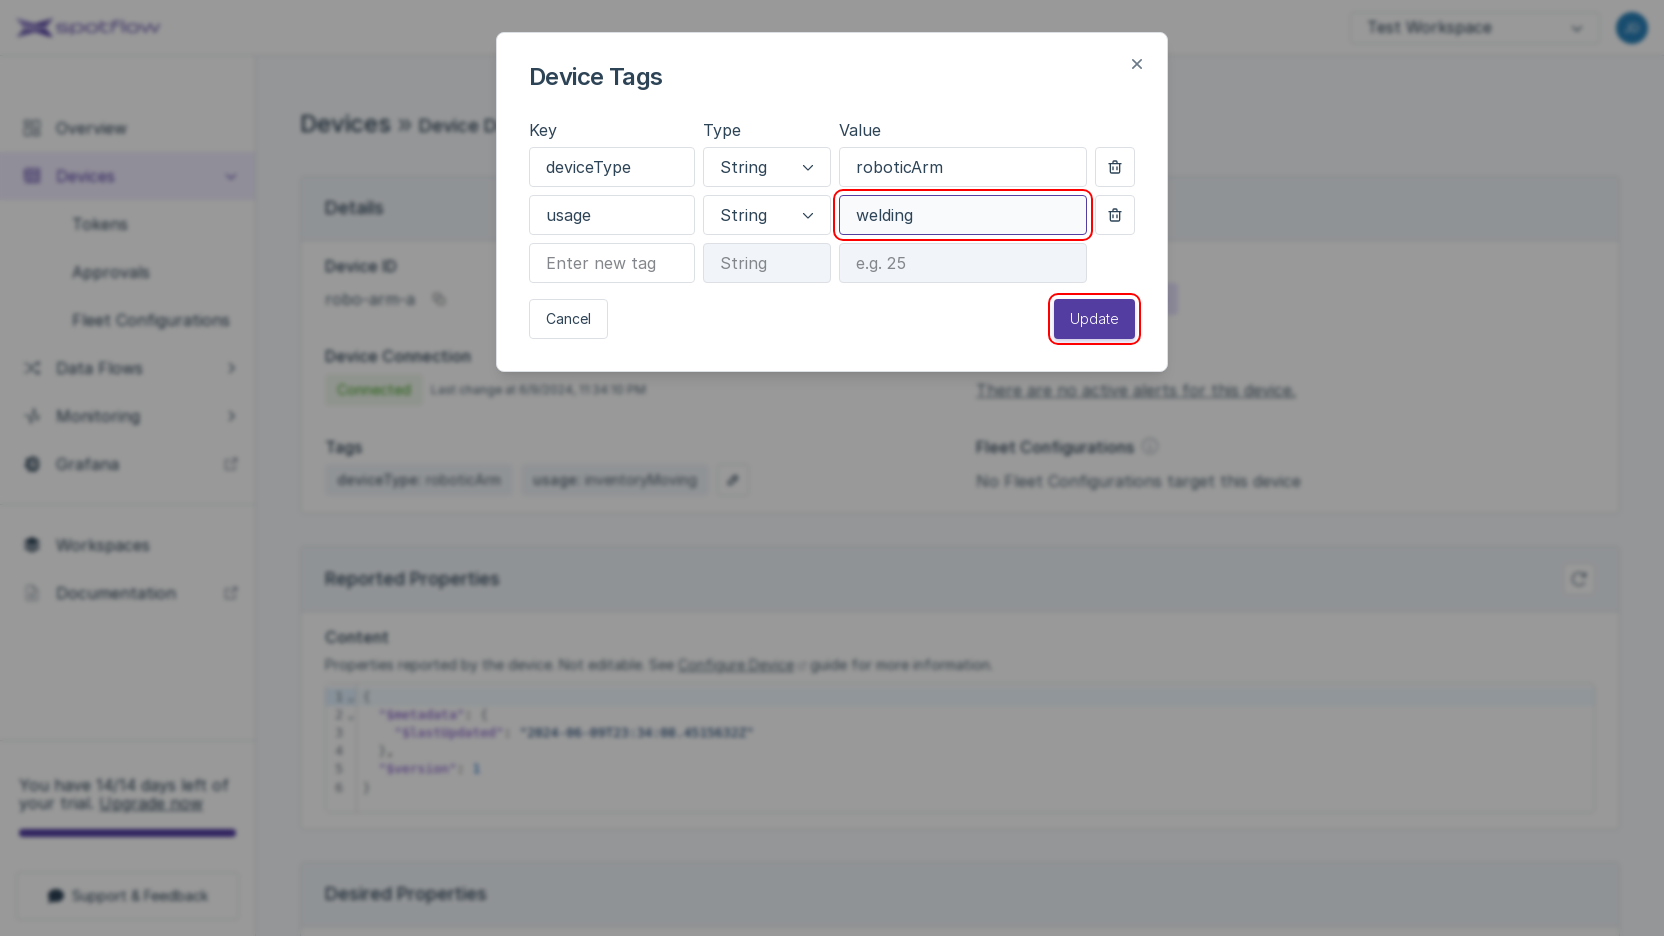
A pop-up window Device Tags opens. Modify the Value of the Tag
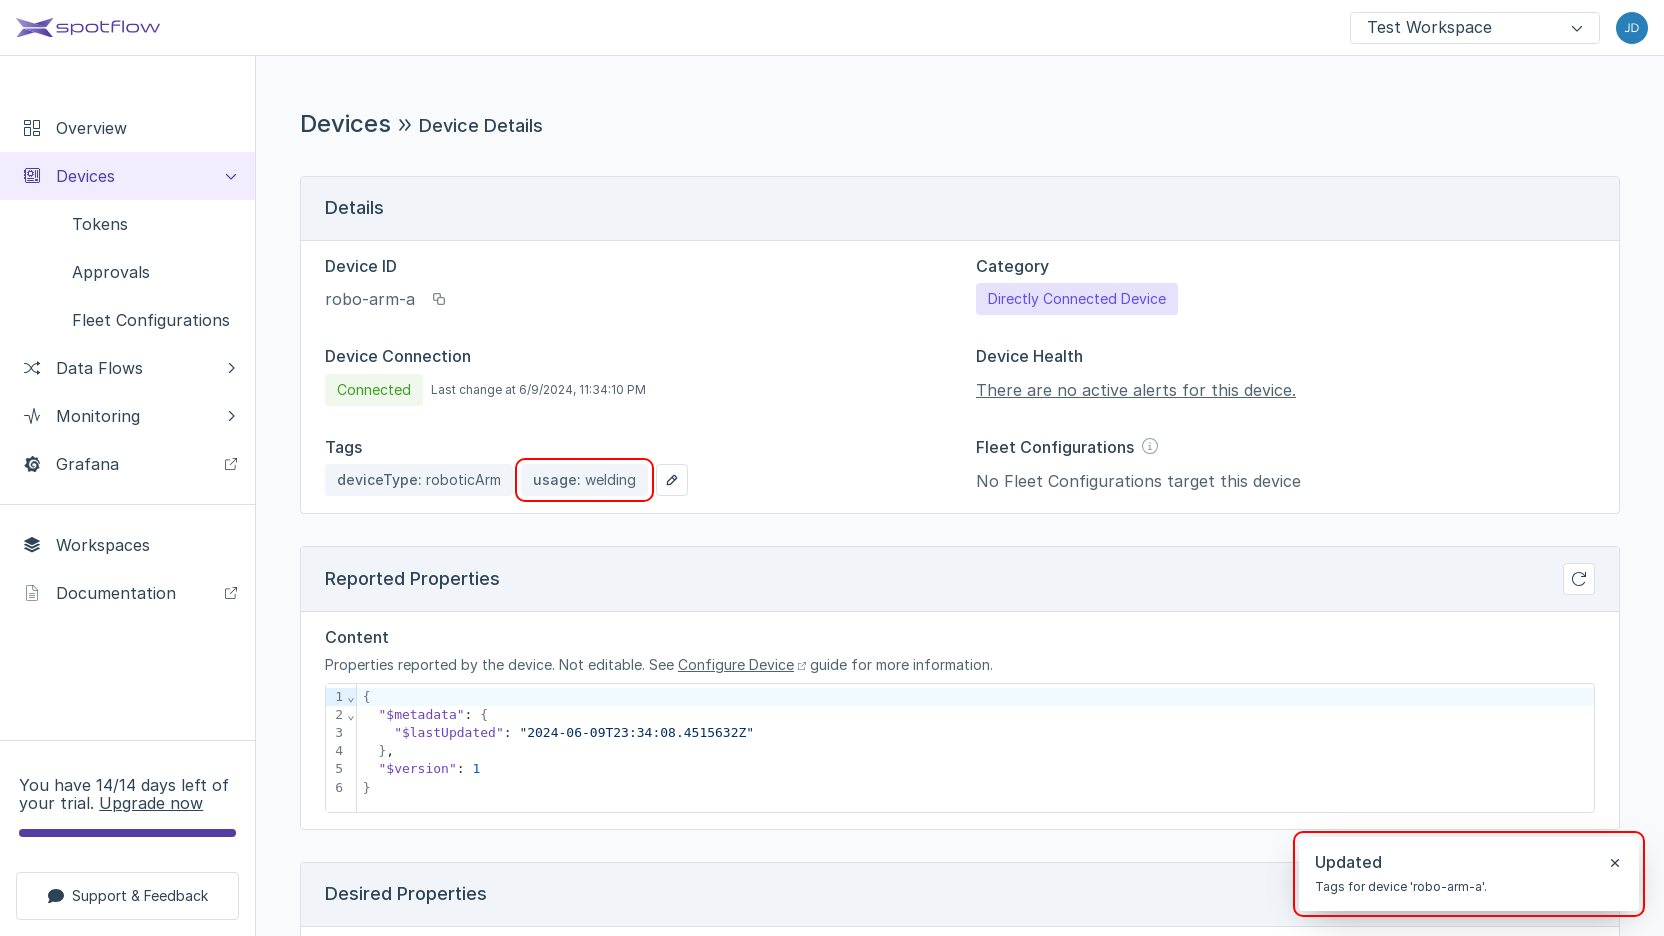
usagetowelding. Click Update.A box with the title Updated confirms that you've successfully updated the Tags of
robo-arm-a. Also, the section Tags should now showusage: welding.
The following command expects that you've stored your Workspace ID and API Access Token in the corresponding variables in the second step.
Change the usage Tag of robo-arm-a to welding using the command:
- cURL
- PowerShell
curl -X PATCH "https://api.eu1.spotflow.io/workspaces/$workspace_id/devices/robo-arm-a/tags" \
 -H "Content-Type: application/json" \
 -H "Authorization: Bearer $access_token" \
 -d '{"tags": {"deviceType": "roboticArm", "usage": "welding"}}' \
 -w "%{http_code}"
(Invoke-WebRequest -Method Patch -Uri "https://api.eu1.spotflow.io/workspaces/$workspaceId/devices/robo-arm-a/tags" `
 -Headers @{
  'Content-Type' = 'application/json'
  'Authorization' = "Bearer $accessToken"
 } `
 -Body '{"tags": {"deviceType": "roboticArm", "usage": "welding"}}').StatusCode
The Platform will return the code 200 to confirm the change.
It might take up to a few minutes for the Platform to reconfigure robo-arm-a.
Eventually, the Device program will receive the proper Desired Properties:
[robo-arm-a] Received Desired Properties of version 2:
{"settings": {"precision": 0.9, "speed": 5}}
[robo-arm-a] Updating Reported Properties
Summary
Congratulations on finishing the tutorial! While the example has shown only two Devices, it should demonstrate that Device Fleet Configuration makes configuring a large fleet of Devices feasible.
What's Next?
- The parent page Configure Devices explains the concepts of Tags and Device Fleet Configuration in more detail.
- The Device SDK references for Python, C, and Rust describes the interface you can use to handle the configuration from the Device side.
- The API reference describes all the ways to create, update, and inspect Device Fleet Configurations programmatically.

