Tutorial: Send Data to Platform
This tutorial will show you how to use Device SDK to send data to the Platform.

Requirements
- PC or any other machine with either Linux or Windows.
- One of the following:
- Python of version ≥ 3.7
- C compiler (examples use GCC with Make on Linux and Visual Studio 2022 on Windows)
- Rust
- If you are not registered to the Spotflow IoT Platform yet, Sign Up.
- You need to have an existing Stream.
A Stream called
default-streamin Stream Groupdefault-stream-groupis created automatically after you register. Create a new one if you want to use a different Stream. - You need to have an existing Provisioning Token.
1. Send Data
Use the Provisioning Token to start a Provisioning Operation. After you approve it, the Device will finish the registration and start sending data to the Platform.
- Python
- C
- Rust
Install the recent Device SDK for Python using the following command:
pip install --upgrade spotflow-device
Paste the following code into a new file, or download it.
Replace the placeholder <Your Provisioning Token> with your Provisioning Token and run the program.
If you want to send data to a different stream you created earlier, replace also default-stream-group and default-stream with the desired Stream Group and Stream name.
import datetime
import json
import time
from spotflow_device import DeviceClient

# Connect to the Platform (starts Device Provisioning if the Device is not already registered)
client = DeviceClient.start(device_id="my-device", provisioning_token="<Your Provisioning Token>", db="spotflow.db")

# Create a sender to the default stream
sender = client.create_stream_sender(stream_group = "default-stream-group", stream = "default-stream")

# Your working code starts here. E.g. read data from your sensors and send it to the platform
for i in range(0, 60):
    # Example: Send sample data to the platform:
    payload = json.dumps({
        "timestamp": datetime.datetime.now().astimezone().isoformat(),
        "temperatureCelsius": 21 + (i * 0.05),
        "humidityPercent": 50 + (i * 0.1)
    })
    sender.send_message(payload.encode())
    print(payload)

    # Pause till next iteration
    time.sleep(5)

# Your working code ends here.
DeviceClient.start will display the Provisioning Operation ID and Verification Code:
Provisioning operation initialized, waiting for approval.
Operation ID: eb82df7f-63ab-429f-80df-f0ae05f57306
Verification Code: 3cwz1g1c
After you approve the operation in the next step, the Device will start sending the data as short Messages.
Download the latest version of the Spotflow Device SDK library for your operating system and processor architecture:
Extract the archive to a directory of your choice.
The file examples/get_started.c contains the following code:
#include <stdlib.h>
#include <stdio.h>
#include <string.h>
#include <time.h>
#include "spotflow.h"

#ifdef _WIN32
#include <windows.h>
#define gmtime_r(timer, buf) gmtime_s(buf, timer)
#else
#include <unistd.h>
#define Sleep(x) usleep((x)*1000)
#endif

void show_last_error()
{
    size_t error_size = SPOTFLOW_ERROR_MAX_LENGTH;
    char* error_buffer = malloc(error_size);
    spotflow_read_last_error_message(error_buffer, error_size);
    printf("Error: %s\n", error_buffer);
    free(error_buffer);
}

void send_data(spotflow_client_t* client)
{
    spotflow_message_context_t* ctx;
    spotflow_message_context_create(&ctx, "default-stream-group", "default-stream");

    const size_t max_size = 1024;
    char* msg = malloc(max_size);

    // Your working code starts here. E.g. read data from your sensors and send it to the platform
    for (int i = 0; i < 60; i++)
    {
        // Example: Send sample data to the platform:
        time_t now_ts = time(NULL);
        struct tm now;
        gmtime_r(&now_ts, &now);

        double temperature = 21 + (i * 0.05);
        double humidity = 50 + (i * 0.1);

        snprintf(
            msg, max_size,
            "{\"timestamp\": \"%04d-%02d-%02dT%02d:%02d:%02dZ\", \"temperatureCelsius\": %g, \"humidityPercent\": %g}",
            now.tm_year + 1900, now.tm_mon + 1, now.tm_mday, now.tm_hour, now.tm_min, now.tm_sec, temperature, humidity);

        printf("%s\n", msg);

        if (spotflow_client_send_message(client, ctx, NULL, NULL, (const uint8_t*)msg, strlen(msg)) != SPOTFLOW_OK)
        {
            show_last_error();
            return;
        }

        // Pause till next iteration
        Sleep(5000);
    }

    // Your working code ends here.

    free(msg);

    spotflow_message_context_destroy(ctx);
}

int main()
{
    spotflow_client_options_t* options;
    // Connect to the Platform (starts Device Provisioning if the Device is not already registered)
    spotflow_client_options_create(&options, "my-device", "<Your Provisioning Token>", "spotflow.db");

    spotflow_client_t* client;
    if (spotflow_client_start(&client, options) != SPOTFLOW_OK)
    {
        show_last_error();
        return 1;
    }

    send_data(client);

    spotflow_client_destroy(client);
    spotflow_client_options_destroy(options);
}
Replace the placeholder <Your Provisioning Token> with your Provisioning Token.
If you want to send data to a different stream you created earlier, replace also default-stream-group and default-stream with the desired Stream Group and Stream name.
Run the program:
- Linux
- Windows
Make sure that you have gcc and make installed.
Navigate to the directory examples/gcc_makefile_dynamic and run the following command:
make run
Open the solution examples/vs2022_dynamic/spotflow_example.sln in Visual Studio 2022.
Press F5 or Debug > Start Debugging to build and run the example program.
spotflow_client_start will display the Provisioning Operation ID and Verification Code:
Provisioning operation initialized, waiting for approval.
Operation ID: b170c9ab-961c-4c02-af88-d4287d9cea1f
Verification Code: jgcjtprw
After you approve the operation in the next step, the Device will start sending the data as short Messages.
Run the following commands to create a new Rust project and add the dependencies including the crate spotflow:
cargo new send_data --bin
cd send_data
cargo add chrono serde_json spotflow
Replace the contents of src/main.rs with the following code (download):
use serde_json::json;

use spotflow::{DeviceClientBuilder, MessageContext};

fn main() {
    // Connect to the Platform (starts Device Provisioning if the Device is not already registered)
    let provisioning_token = String::from("<Your Provisiniong Token>");

    let client = DeviceClientBuilder::new(
        Some(String::from("my-device")),
        provisioning_token,
        "spotflow.db",
    )
    .build()
    .expect("Unable to build ingress connection");

    // Create a Message context to send Messages to the Stream 'default' of the Stream Group 'default'
    let message_context =
        MessageContext::new(Some(String::from("default-stream-group")), Some(String::from("default-stream")));

    // Your working code starts here. E.g. read data from your sensors and send it to the platform
    for i in 0..60 {
        // Example: Send sample data to the platform:

        let payload = json!({
            "timestamp": chrono::offset::Utc::now().to_rfc3339(),
            "temperatureCelsius": 21.0 + (i as f64 * 0.05),
            "humidityPercent": 50.0 + (i as f64 * 0.1),
        })
        .to_string();

        client
            .enqueue_message(&message_context, None, None, payload.clone().into_bytes())
            .expect("Unable to send message");

        println!("{payload}");

        // Pause till next iteration
        std::thread::sleep(std::time::Duration::from_secs(5));
    }

    // Your working code ends here.

    // Wait for all the messages to be sent
    loop {
        let pending = client
            .pending_messages_count()
            .expect("Unable to obtain the number of pending messages");

        if pending == 0 {
            break;
        }

        println!("Waiting for {} more messages to be sent.", pending);
        std::thread::sleep(std::time::Duration::from_secs(1));
    }
}
Replace the placeholder <Your Provisioning Token> with your Provisioning Token.
If you want to send data to a different stream you created earlier, replace also default-stream-group and default-stream with the desired Stream Group and Stream name.
Run the program:
cargo run
DeviceClientBuilder::build will display the Provisioning Operation ID and Verification Code:
Provisioning operation initialized, waiting for approval.
Operation ID: b170c9ab-961c-4c02-af88-d4287d9cea1f
Verification Code: 3cwz1g1c
After you approve the operation in the next step, the Device will start sending the data as short Messages.
2. Approve Device
While the code on the Device side is still running, you'll now approve the Provisioning Operation started in the previous step:
- Portal
- CLI
- API
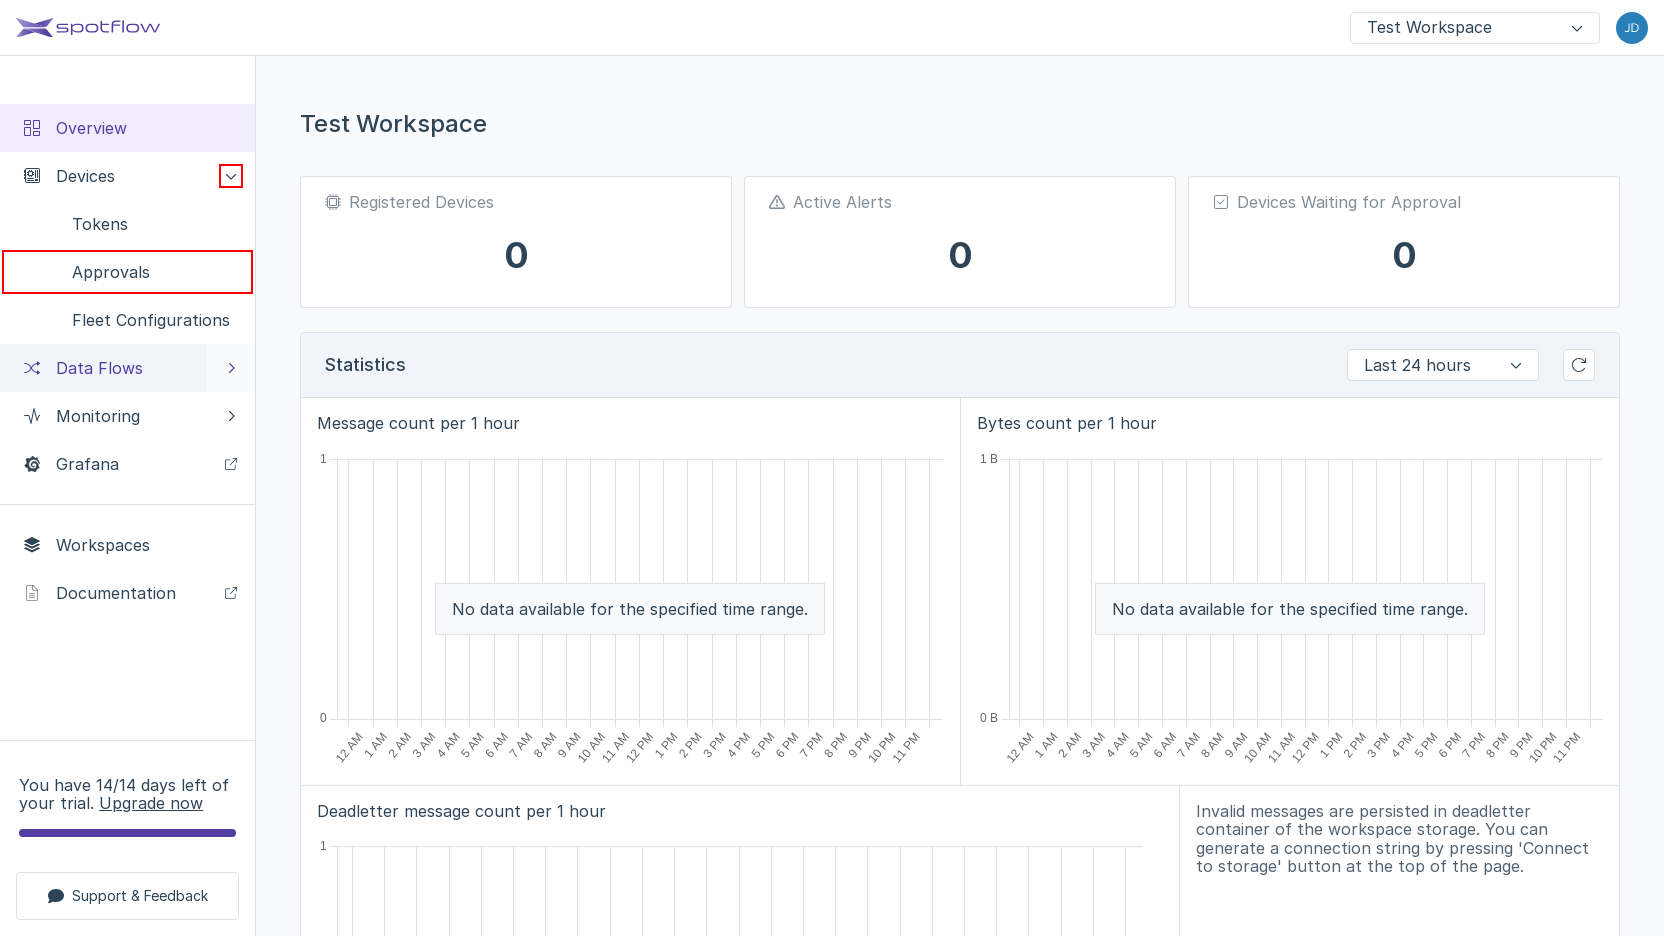

Expand the link Devices in the left sidebar if it's not already expanded. Open the link Approvals.
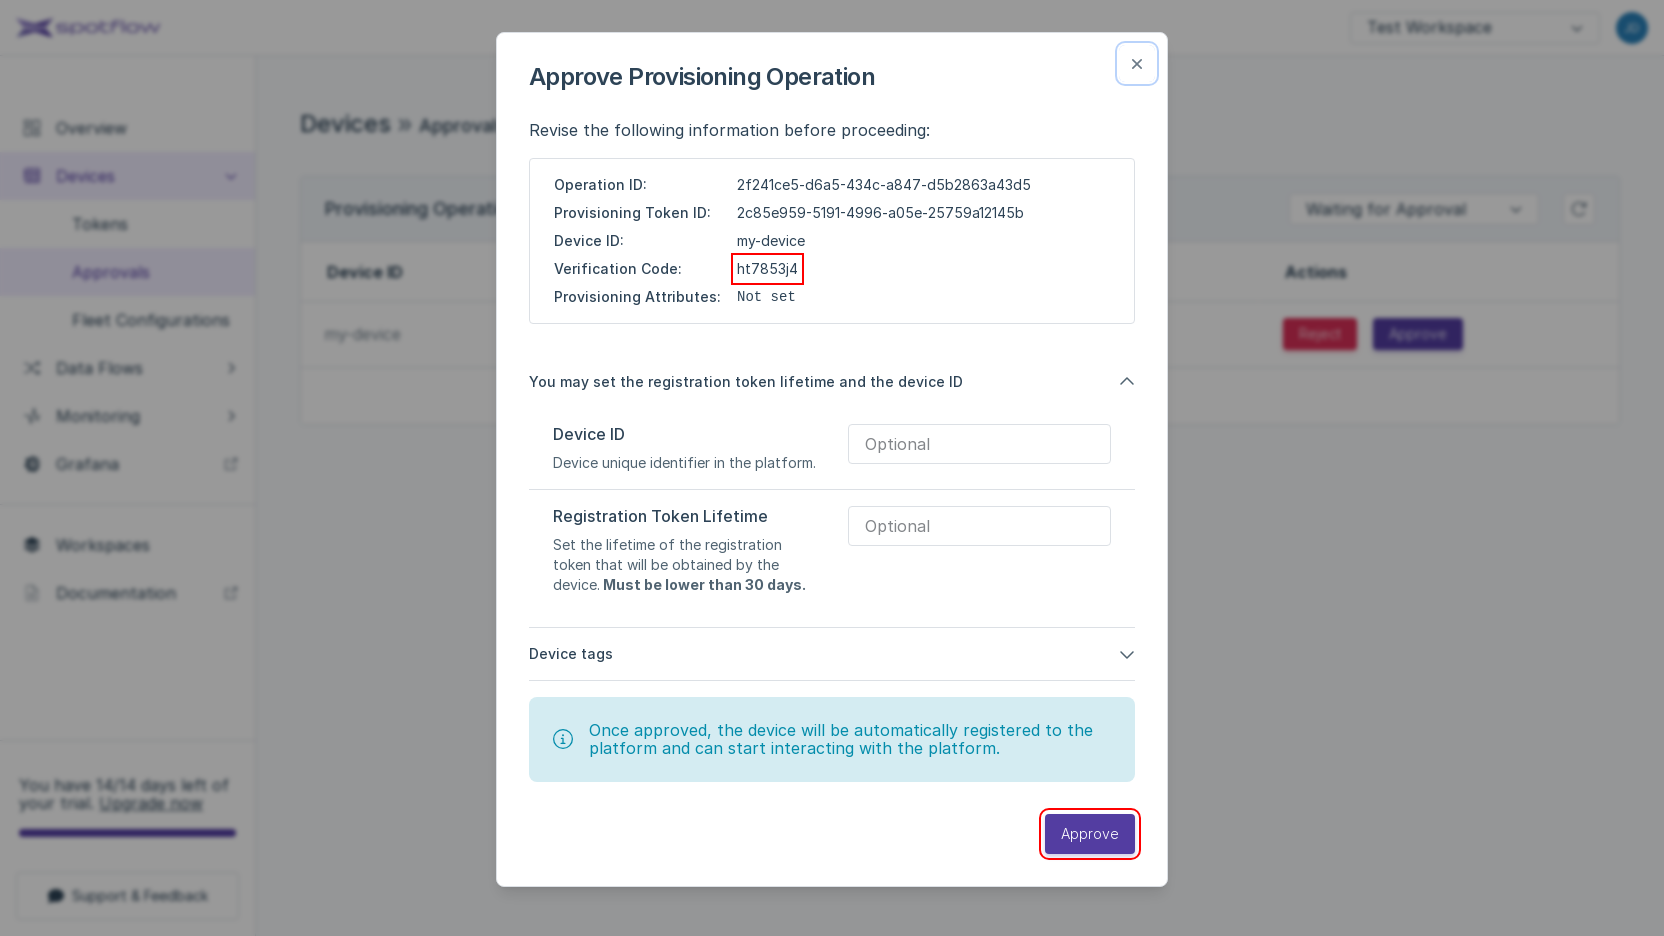
The list of Provisioning Operations opens. You should see a row with the Device ID
my-device. Click Approve in the column Actions.The approval dialog window shows the Provisioning Operation details and allows you to override Device registration details. Check the Verification Code, leave the default values and click Approve.
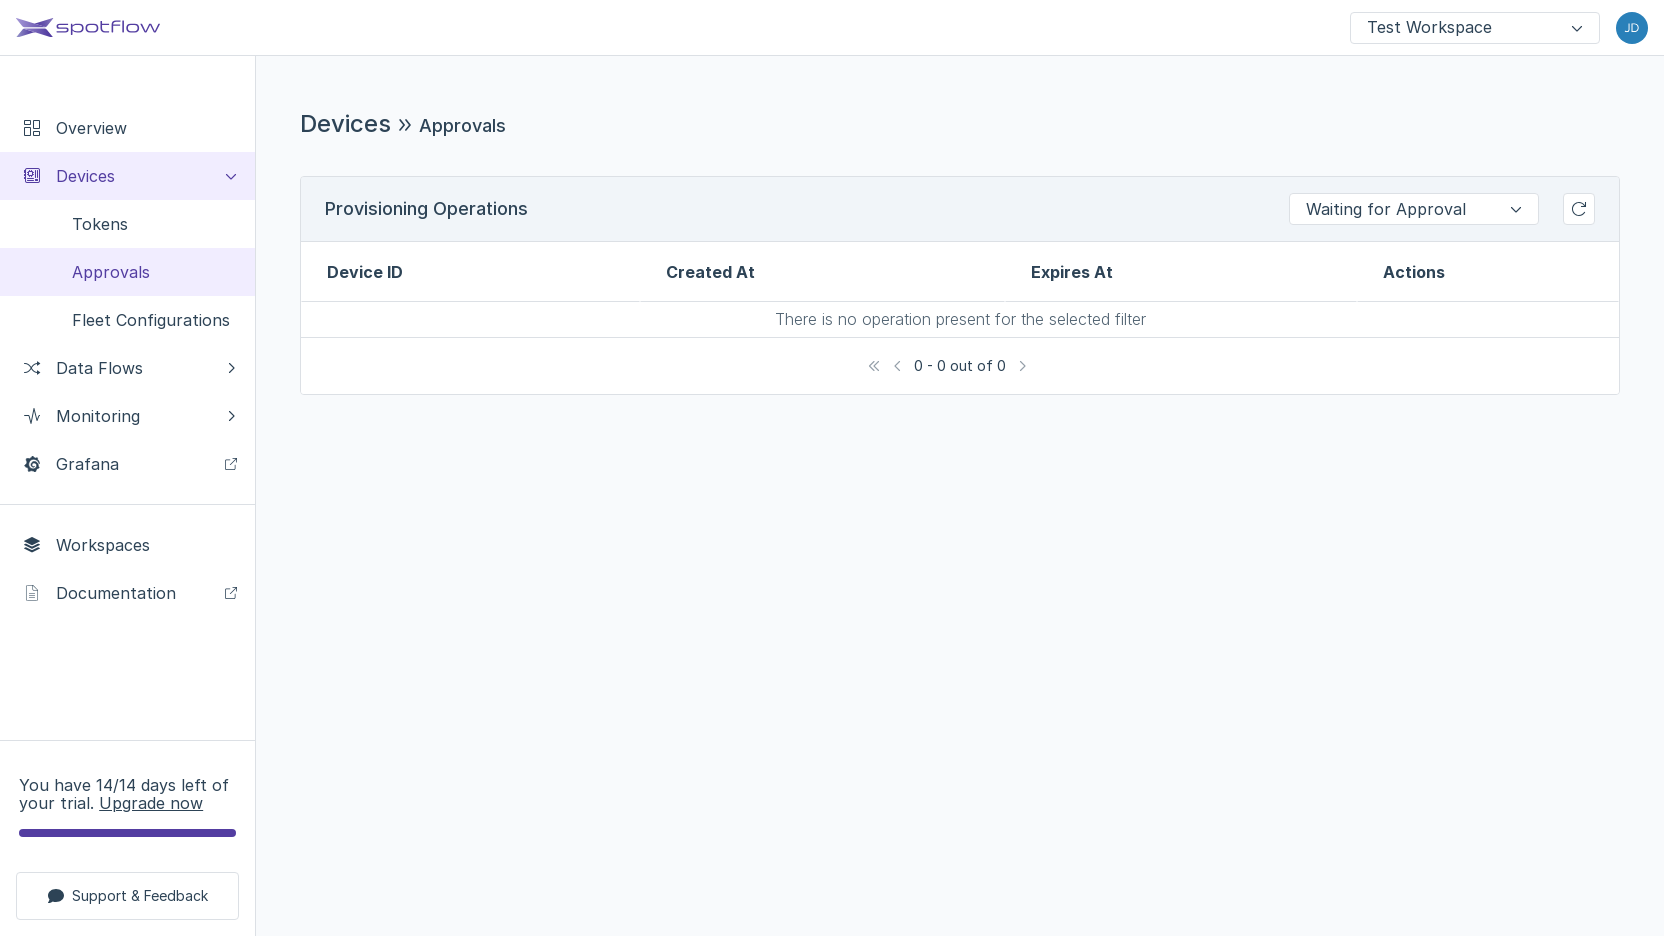
Good job! The Device disappeared from the table because its state changed to Approved, while the current filter shows only the Devices in the state Waiting for Approval.
The following instructions expect that you have already installed the CLI and logged in.
Run the following command in a different terminal window than where the Device SDK is running.
Replace the placeholder <Your Provisioning Operation ID> by the Operation ID you received from the Device in the previous step.
spotf provisioning-operation approve --provisioning-operation-id <Your Provisioning Operation ID>
The CLI will confirm the Provisioning Operation approval:
Provisioning operation 'b170c9ab-961c-4c02-af88-d4287d9cea1f' approved successfully.
The following instructions expect that you have already obtained the API access token from the Portal and that you know the Workspace ID.
Replace the placeholders <Your Workspace ID>, <Your API Access Token>, and <Your Provisioning Operation ID> with your Workspace ID, API access token, and Provisioning Operation ID and run the following command to approve the Provisioning Operation:
- cURL
- PowerShell
curl -X PUT 'https://api.eu1.spotflow.io/workspaces/<Your Workspace ID>/provisioning-operations/approve' \
 -H 'Content-Type: application/json' \
 -H 'Accept: application/json' \
 -H 'Authorization: Bearer <Your API Access Token>' \
 -d '{"provisioningOperationId": "<Your Provisioning Operation ID>"}' \
 -w "%{http_code}"
(Invoke-WebRequest -Method Put -Uri 'https://api.eu1.spotflow.io/workspaces/<Your Workspace ID>/provisioning-operations/approve' `
 -Headers @{
   'Content-Type' = 'application/json'
   'Accept' = 'application/json'
   'Authorization' = 'Bearer <Your API Access Token>'
 } `
 -Body '{"provisioningOperationId": "<Your Provisioning Operation ID>"}').StatusCode
The API will return the code 201 to confirm the approval.
Finally, if you look at the program output, you should see that the device is registered and started sending Messages:
Provisioning operation initialized, waiting for approval.
Operation ID: eb82df7f-63ab-429f-80df-f0ae05f57306
Verification Code: 3cwz1g1c
{"timestamp": "2024-04-04T08:51:34.351761+02:00", "temperatureCelsius": 21.0, "humidityPercent": 50.0}
{"timestamp": "2024-04-04T08:51:39.358295+02:00", "temperatureCelsius": 21.05, "humidityPercent": 50.1}
{"timestamp": "2024-04-04T08:51:44.370000+02:00", "temperatureCelsius": 21.1, "humidityPercent": 50.2}
...
The Device SDK documentation provides more information about Python SDK and C SDK.
3. See Registered Device
When the Device SDK completes the registration, the Device appears in the table of all registered Devices.
- Portal
- API

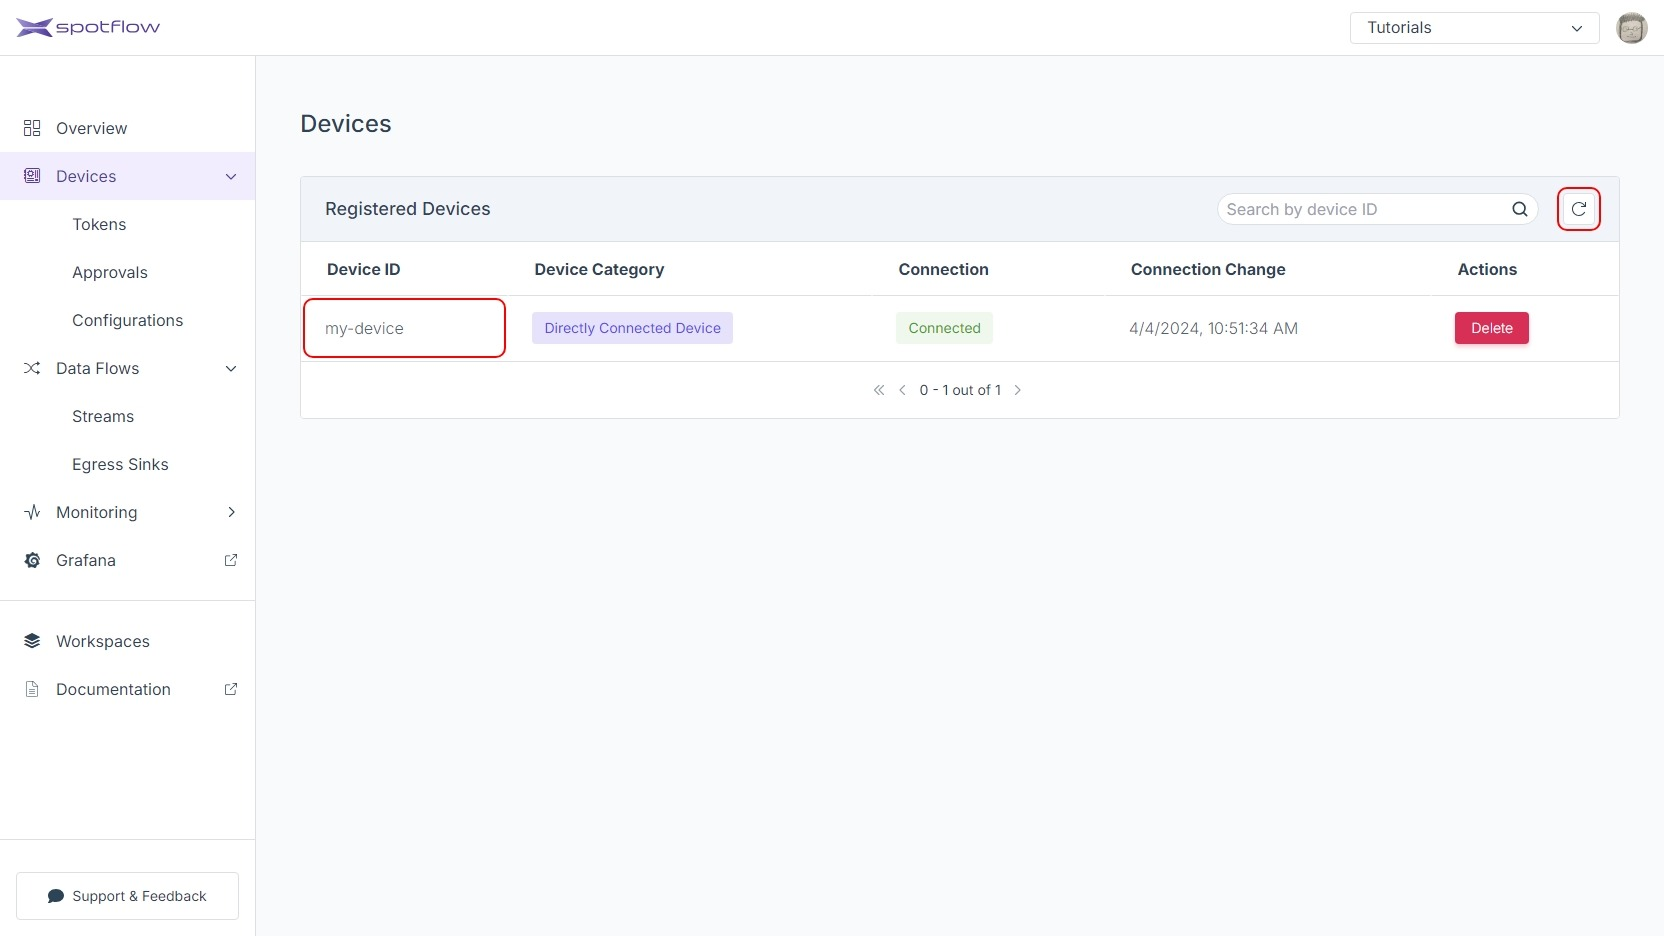
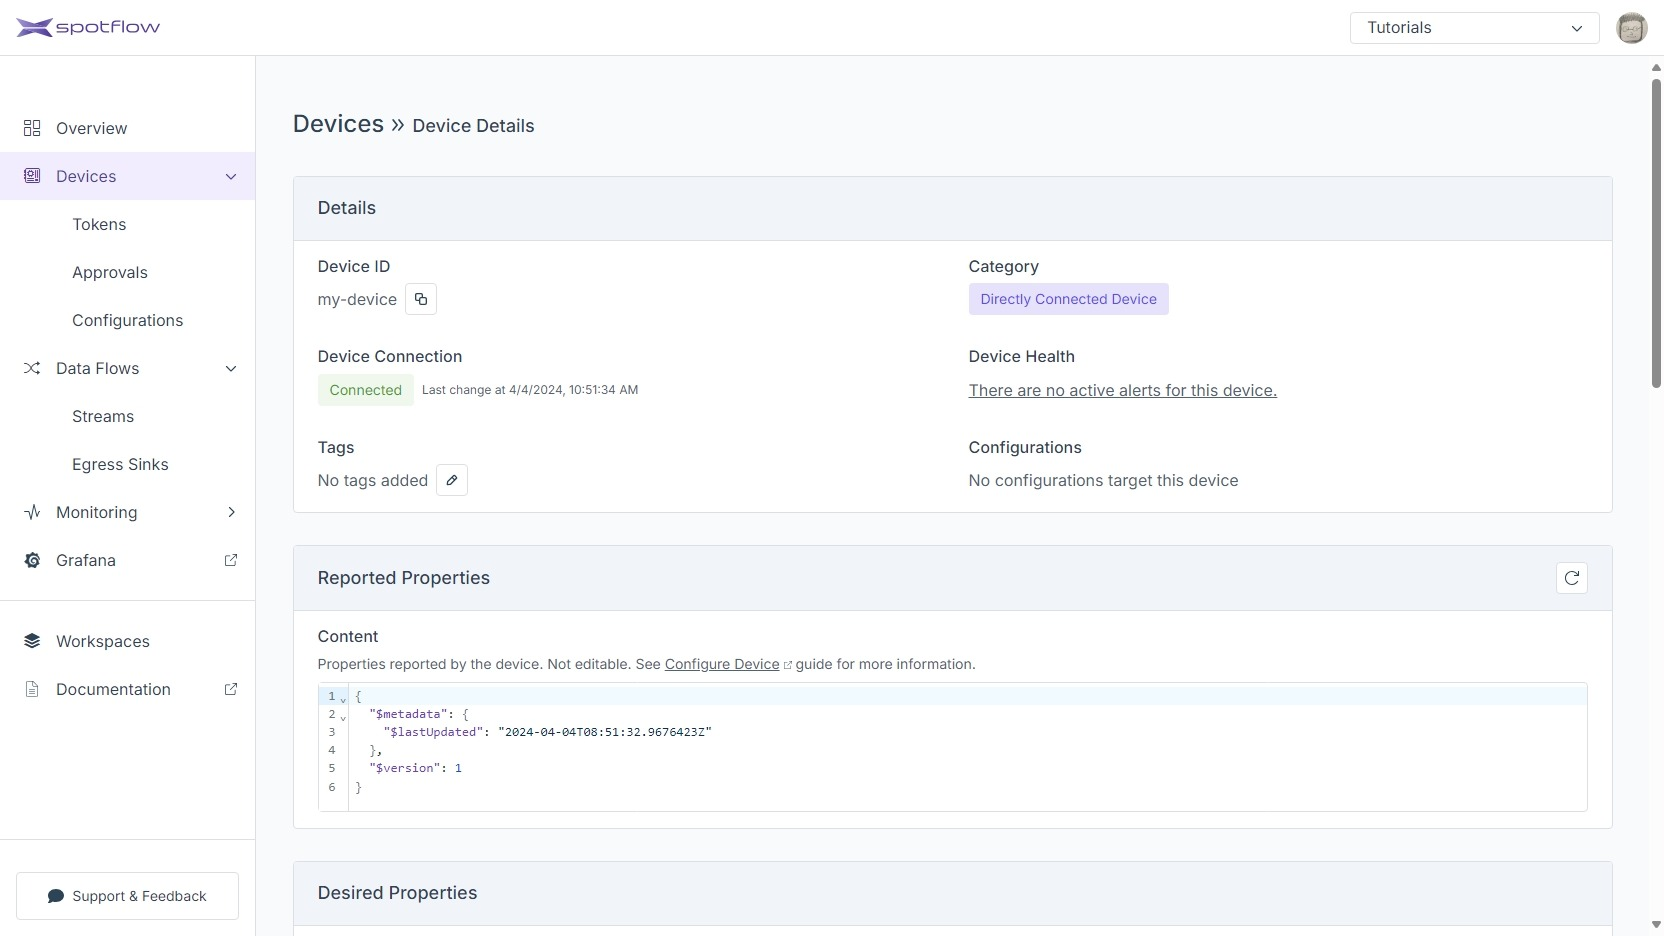
Navigate to the list of registered Devices by clicking the link Devices in the left sidebar.
You should see a row in the table with the Device ID
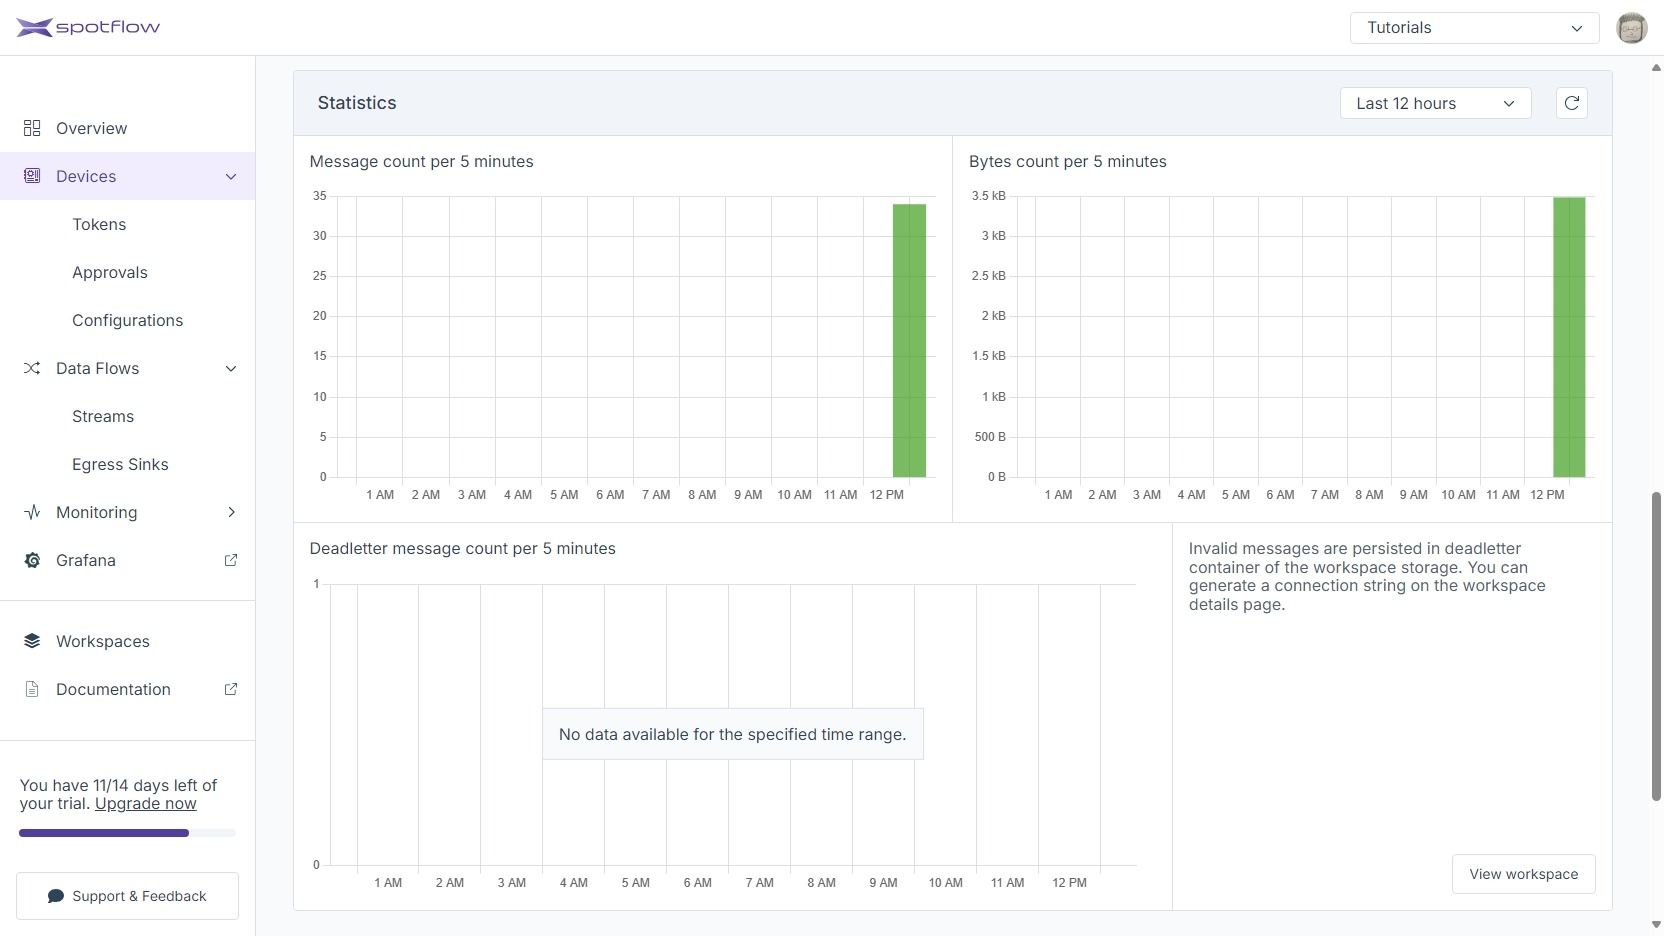
my-device. If you don't see it, the Device hasn't completed the registration yet. Ensure that the code on the Device side finished the registration and proceeded to send Messages, and click the refresh button after a few seconds. Click the Device IDmy-deviceto see the details.The Device Details page is useful to inspect the Device state. Device Connection shows whether the Device is currently connected to the Platform. In our case, the status will be Connected when the program is sending Messages and Disconnected otherwise. Scroll down to see Statistics.
Statistics show the recent traffic from the Device. There might be a lag of several seconds before the Portal shows the current information, so refresh the section as needed.
The following instructions expect that you have already obtained the API access token from the Portal and that you know the Workspace ID.
Replace the placeholders <Your Workspace ID>, <Your Device ID>, and <Your API Access Token> with your Workspace ID, your Device ID and API access token and run the following command to get the activity details of the Device:
- cURL
- PowerShell
curl -X GET 'https://api.eu1.spotflow.io/workspaces/<Your Workspace ID>/devices/<Your Device ID>/activity' \
 -H 'Content-Type: application/json' \
 -H 'Accept: application/json' \
 -H 'Authorization: Bearer <Your API Access Token>' \
Invoke-WebRequest -Method Get -Uri 'https://api.eu1.spotflow.io/workspaces/<Your Workspace ID>/devices/<Your Device ID>/activity' `
-Headers @{
  'Content-Type' = 'application/json'
  'Accept' = 'application/json'
  'Authorization' = 'Bearer <Your API Access Token>'
}
The API will return the code 200 and the following payload:
{
    "deviceId": "my-device",
    "deviceUniqueId": "my-device",
    "deviceCategory": "DirectlyConnectedDevice",
    "connection": {
        "status": "Connected",
        "lastChange": "2024-04-04T08:51:32.9676423+00:00"
    },
    "activity": {
        "isActive": true,
        "latest": {
            "activityId": "Cloud.DeviceConnected",
            "dateTime": "2024-04-04T08:51:32.9676423+00:00"
        },
        "all": [
            {
                "activityId": "Cloud.DeviceConnected",
                "dateTime": "2024-04-04T08:51:32.9676423+00:00"
            },
            {
                "activityId": "Cloud.DeviceRegistration",
                "dateTime": "2024-04-04T08:51:32.7297151+00:00"
            }
        ]
    }
}
What's Next
- Route your data to Spotflow Grafana or one of your systems.
- The parent page Send Data from Devices explains Messages, Streams and other related concepts in more detail.
- The Device SDK references for Python, C, and Rust describe the interface you can use to connect Devices to the Platform and send data.